
We’re excited to present our comprehensive guide on how to use Launchpad to create an NFT collection on Arbitrum. This step-by-step walkthrough will take you through the entire collection process, highlighting some advanced options you can choose to customize your NFTs. It’s important to note that creating an NFT collection can vary depending on your specific needs, so feel free to skip over any steps that don’t apply to you. Whether you’re a beginner or an experienced NFT creator, this guide will provide you with everything you need to create and deploy your own NFT collection on Arbitrum. Let’s get started!
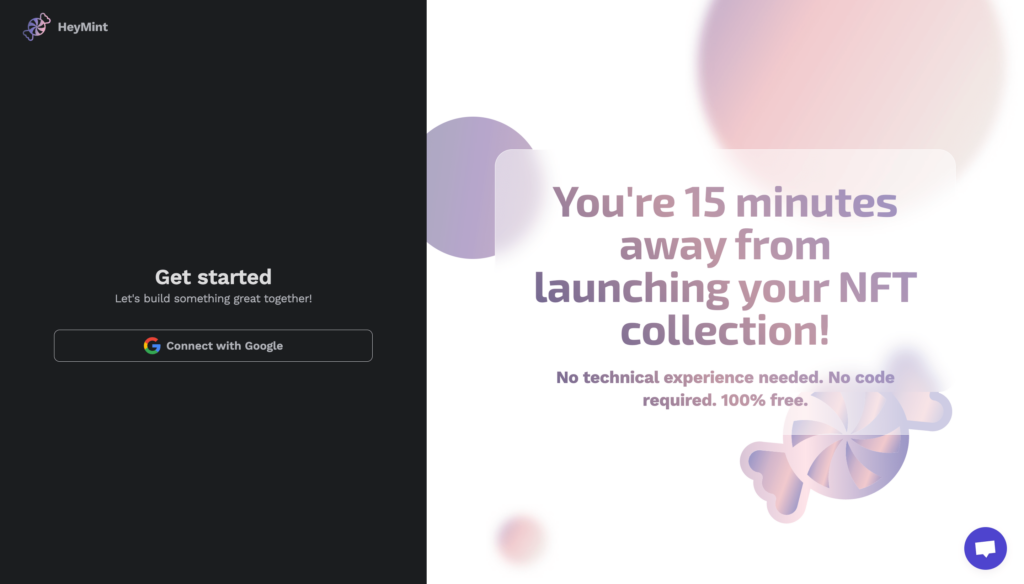
1. Connect your Google account to HeyMint’s Get started page.
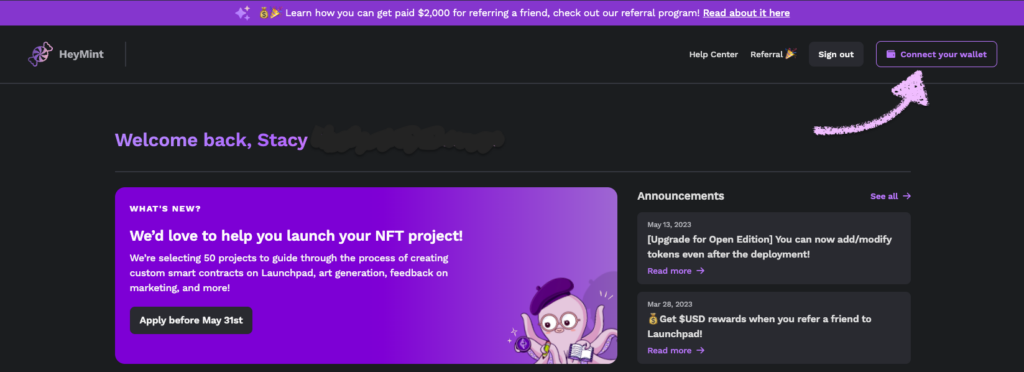
2. Connect Your Wallet
Now that you’ve signed in, it’s time to connect your wallet. Click on the “Connect your wallet” button located in the upper right corner of your tab.
We’ll be creating a collection in the Arbitrum Goerli test net today, so it’s important to have enough gas for transactions. If you don’t have enough gas, you can easily get some by visiting https://faucet.quicknode.com/arbitrum/goerli and obtaining some Goerli for gas fees (your wallet must hold at least 0.001 ETH on Ethereum Mainnet to use the EVM faucets).
3. Sign the signature request pop-up that appears (this is used for identification purposes only; you will not be charged).
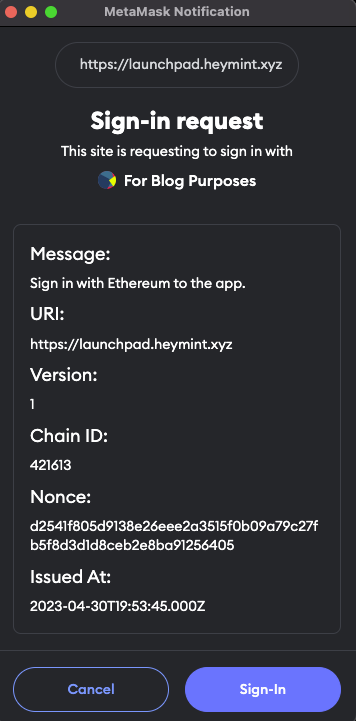
After signing, you will see your wallet connected in the upper right-hand corner of the screen.
4. Connect to the Arbitrum Goerli Network
Look for the network selector beside your wallet address in the upper right corner of your window.
Click the network selector and select “Arbitrum Goerli” from the available options.
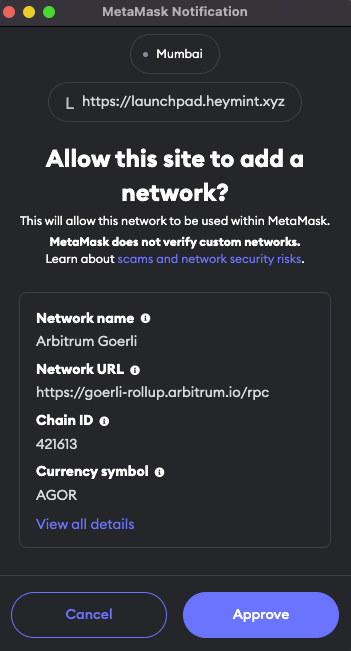
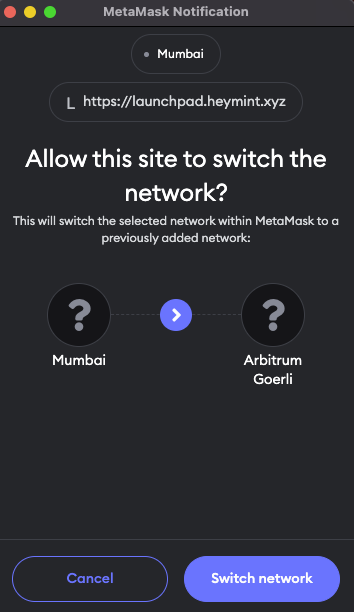
If you’re not already connected to the Arbitrum Goerli test net, a prompt will pop up to allow Launchpad to add a network. Click “Approve” and wait a few seconds. Another prompt will pop up to switch your network. Click “Switch Network” and wait a few seconds for the switch to complete.
5. Create a New Collection
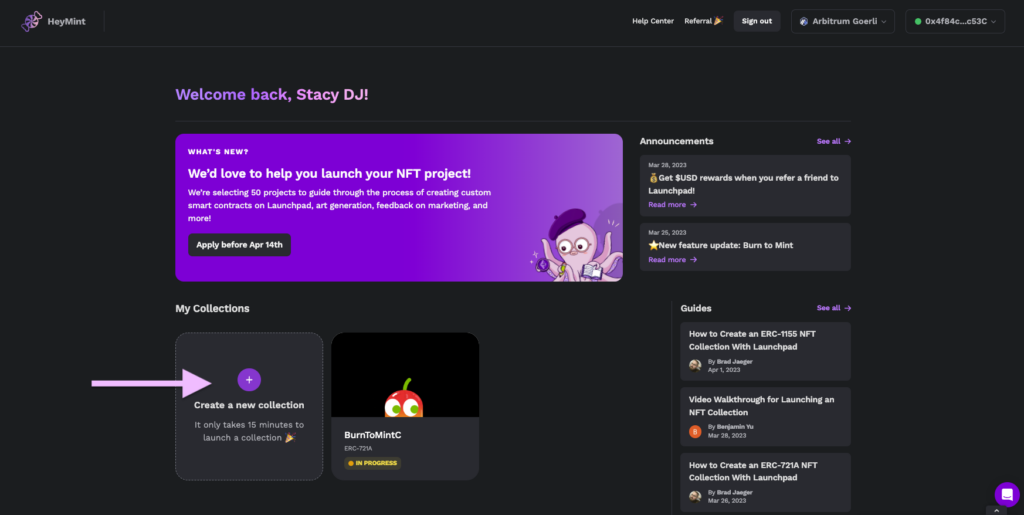
Now that you’ve connected your wallet and obtained enough gas for transactions, it’s time to create your burn-to-mint NFT collection. To get started, simply click on the “Create a new collection” button.
6. Choose the Type of Collection
After clicking on the “Create a new collection” button, a form will appear where you can select the type of collection you want to create. In this guide, we’ll be using ERC 721A.
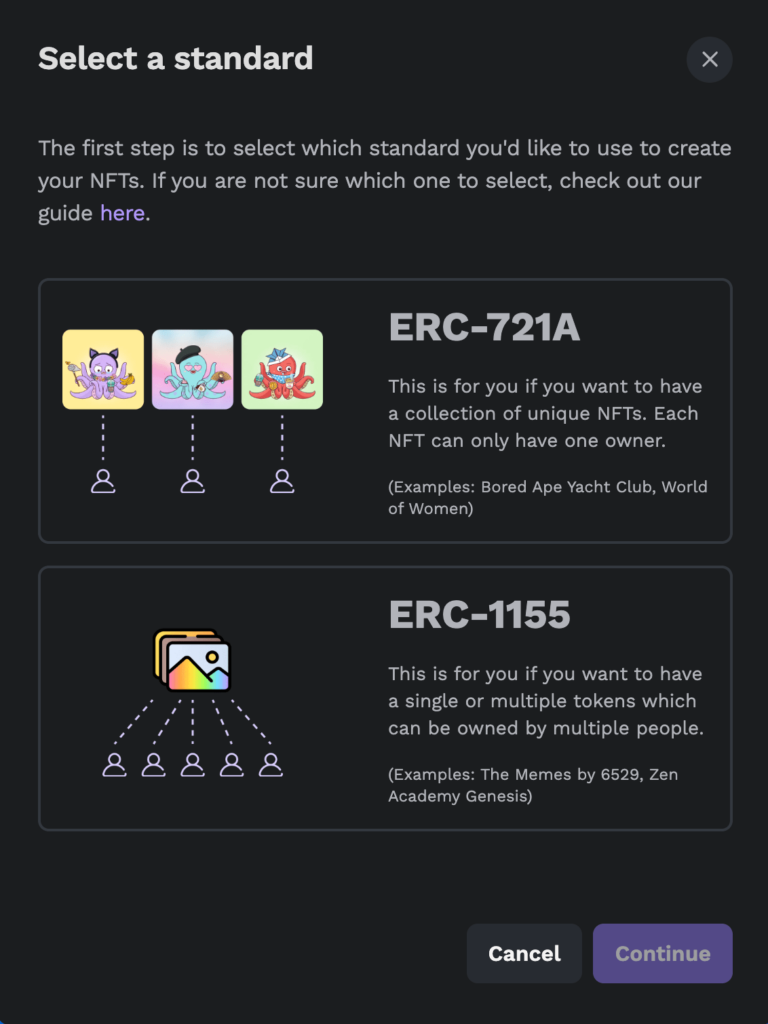
ERC 721A is a type of non-fungible token (NFT) standard used to create unique, one-of-a-kind digital assets. It’s an upgraded version of the popular ERC 721 standard, which is commonly used for creating NFTs.
One popular example of an ERC 721-based NFT collection is the Bored Ape Yacht Club by Yuga Labs. This collection features unique and highly sought-after digital apes that are one-of-a-kind and exclusive to their respective owners.
7. After clicking on “Continue”, fill in Basic Collection Details
Now that you’ve chosen the type of collection, it’s time to fill in some basic details about your project. These details will help your NFT collection stand out and be easily recognizable on NFT marketplaces and token trackers like Arbiscan.
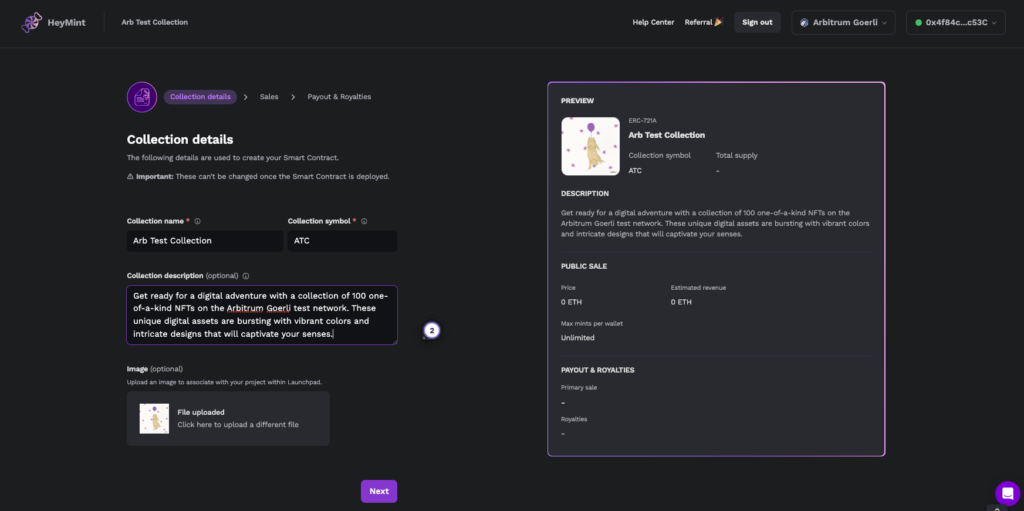
Here are the details you’ll need to provide:
Collection name: This is the official name of your NFT collection that will appear on NFT marketplaces and Arbiscan. Make sure it’s unique and memorable, as it cannot be changed after deploying your smart contract.
Collection symbol: This is a short symbol, typically in all caps and 3-5 characters in length, that serves as an abbreviation for the name of your NFT collection. This will show up on token trackers such as Arbiscan and also cannot be changed after deploying your smart contract. For example, the Bored Ape Yacht Club’s collection symbol is “BAYC.”
Collection description: This is a short (and optional) description that will be visible in your token metadata and displayed in the description section for each token on OpenSea. Use this space to give potential buyers an idea of what your NFT collection is all about and why it’s unique.
Image: This is an (optional) image you can use to associate with your project within Launchpad. We accept gif, .png, .jpeg, or .jpg. Make sure your image is eye-catching and relevant to your NFT collection.
As you fill in your collection details, you’ll see a preview appear on the right-hand corner of your screen. This will help you visualize what your NFT collection will look like once it’s deployed.
8. Set Your Sale Details
Set the “Total Token Supply” for your collection. This is the total number of NFTs available for mint, inclusive of presale, public sale, and any gifted/reserved NFTs.
By default, the “Public Sale” toggle is enabled. If you wish to only run a private sale, you can disable this toggle.

Set the “Price” for each NFT in the public sale. If you leave the price blank, it will be a free mint. Note that a fee of (0.0007 ETH/~$1) is applied to collectors for each token minted, with limited exceptions.
Click the “+ Advanced Settings” button under “Price” to access additional options. Here you can set the “Max Mints Per Wallet,” which is the maximum number of NFTs that can ever be minted by a single address across multiple transactions. You can also enable the “Schedule Minting Time” option to limit the time range in which minting is allowed.
If you enable the Presale & Allowlist toggle, you can set a separate price for collectors on your allowlist to mint each NFT in the presale, and limit the presale mints. The Max mints per wallet is an optional setting that lets you limit the number of NFTs that can be minted by a single address across multiple transactions.
The Presale supply is an optional setting that allows creators to limit the number of NFTs available for minting during presale. Once the number of mints reaches the limit set for the Presale supply, the presale will automatically turn off and all remaining NFTs can only be minted in the public sale.
As you fill in the details, a preview will appear on the right-hand corner of your screen. Once you’re happy with your sale settings, click the “Next” button to continue.
9. Configure Payout & Royalties
After setting up the sale details, it’s time to configure the payout and royalties for your NFT collection. In this step, you can set your primary payout wallet address where all revenue will be deposited. You can also add additional wallet addresses and establish a percentage split between them.
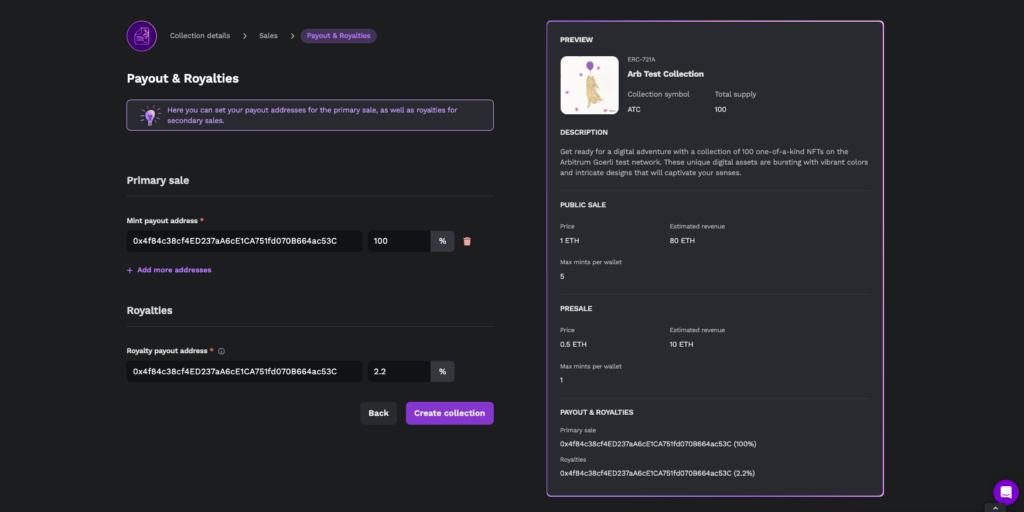
Additionally, you can designate a wallet for your royalties, which are a percentage of your secondary sales. This allows you to earn a portion of the sale price every time your NFT is sold on the secondary market.
It’s important to note that we’ll return to the subject of royalties later when discussing enforceable royalties and marketplace blocklists.
Once you’re happy with the settings, click the “Create collection” button to complete the process.
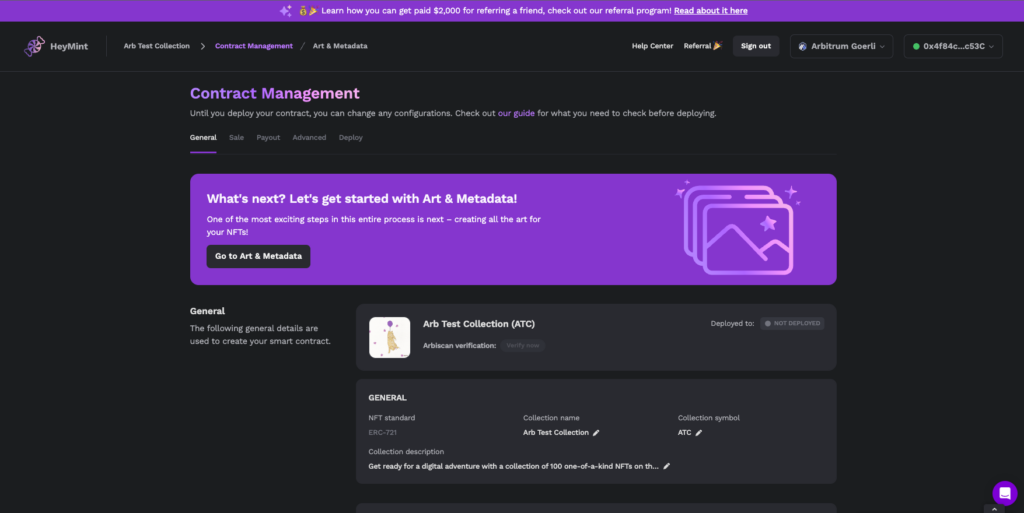
10. After creating your collection, you will be directed to the Contract Management Dashboard.
From here, you can easily navigate between different settings such as General, Sale, Payout, Advanced, and Deploy pages. Most of these settings will have already been pre-configured based on your previous inputs.
11. Art & Metadata: Tell us more about your art
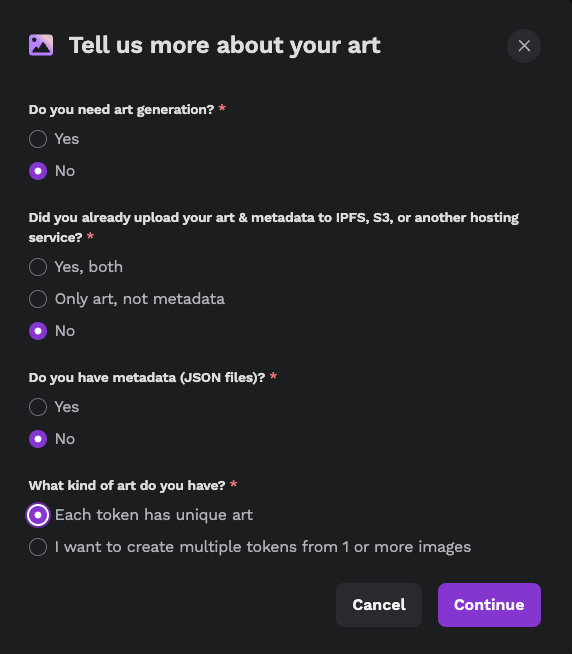
12. Art Generation
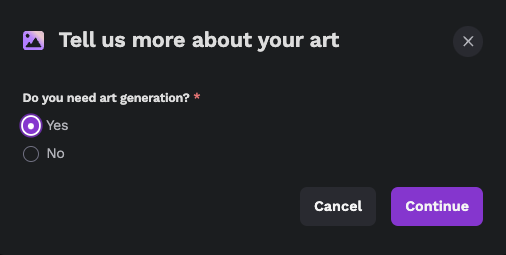
In this step, you will upload the art layers for your NFT collection. First, click on “Yes” for Do you need art generation? And then click on the “Continue” button. Then, select a single folder that contains subfolders for each layer of traits in your collection, such as Hair, Outfit, Expressions, and so on. Each subfolder should include all the variants of each trait type. If you don’t have layer files, you can download and use the provided assets to test out the art generation process.

Once you select the folder, you will be prompted to upload files to the site. Click “upload” to proceed. Finally, click the “upload” button at the bottom right-hand corner of the page to complete the process. Once your upload is complete, you will automatically advance to the next section, which is the layer order.
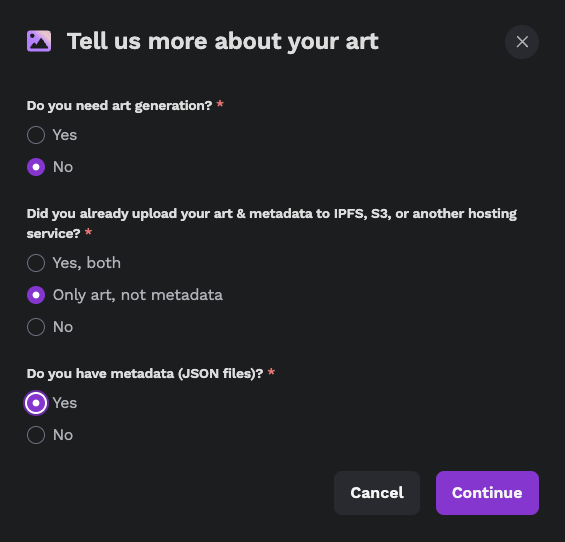
- Upload Layers (If You Already Have the Art but Not the Metadata)
(Note: if you already uploaded your art layers, skip this section and head to 13. Set Your Layer Order).
A brief overview of the process:
Make an account with NFT.Storage and install the NFTUp app.
Upload your Assets to NFT.Storage
Provide Launchpad Your CID from IPFS
Set NFT.Storage API key
A complete step-by-step guide to this process can be found within Launchpad itself. From the upload layers page select “I already generated my art myself or am using a different service”. On the new page, select the “I have art, but not metadata” button for a complete walkthrough to the process listed above.
- Upload Layers (If You Have Both the Art and the Metadata, and Already Uploaded Both)
(Note: if you already uploaded your art layers, skip this section and head to 13. Set Your Layer Order).
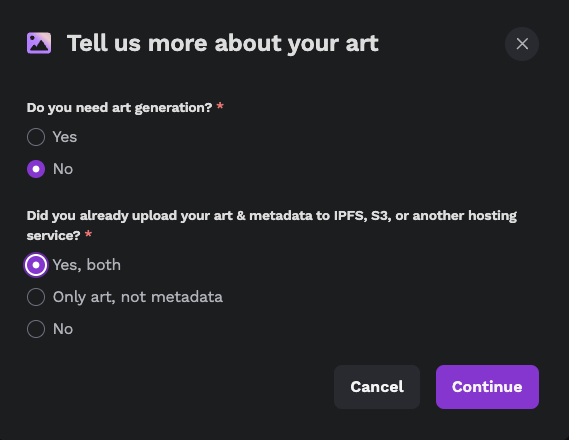
If you already have your metadata uploaded somewhere else, you can provide a custom token base URI instead. Be sure to enter the IPFS link that points to the folder that has your metadata files, .json files, not the image files.
To learn more about how to create and set metadata correctly, check out our article “How to Create NFT Metadata“.
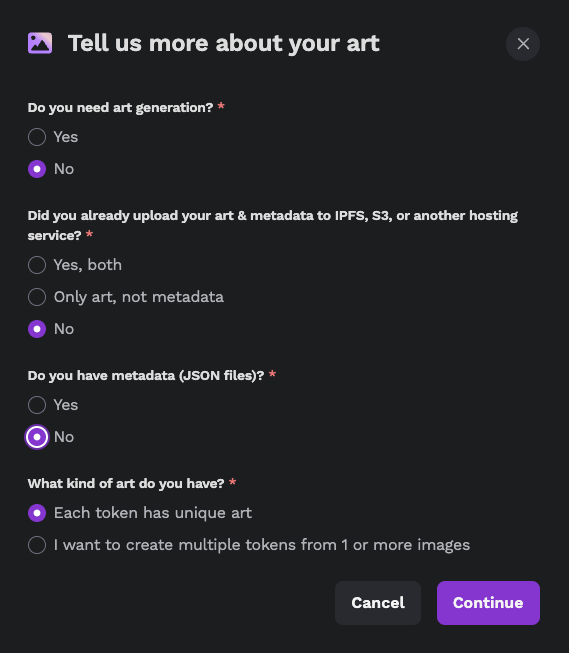
- Alternate Path: Upload Layers (If You Have Both the Art and the Metadata, But Need Help Uploading the Art and/or Metadata)
(Note: if you already uploaded your art layers, skip this section and head to 13. Set Your Layer Order).
A brief overview of the process:
Make an account with NFT.Storage and install the NFTUp app.
Upload your Assets to NFT.Storage
Provide Launchpad Your CID from IPFS
Set NFT.Storage API key
A complete step-by-step guide to this process can be found within Launchpad itself. From the upload layers page select “I already generated my art myself or am using a different service”. On the new page, select the “I need help uploading my art and/or metadata” button for a complete walkthrough to the process listed above.
13. Set Your Layer Order
In this step, you may arrange your layers of traits. This order will then be applied to every token generated in your collection. You may drag the position of the layers to your liking: as you do so, a preview image on the right side of the screen will show you what it looks like.
Keep in mind that layers are assembled from the bottom up (e.g. a background image should be the bottommost layer in the list, as it will be applied first, under all of the layers above it).
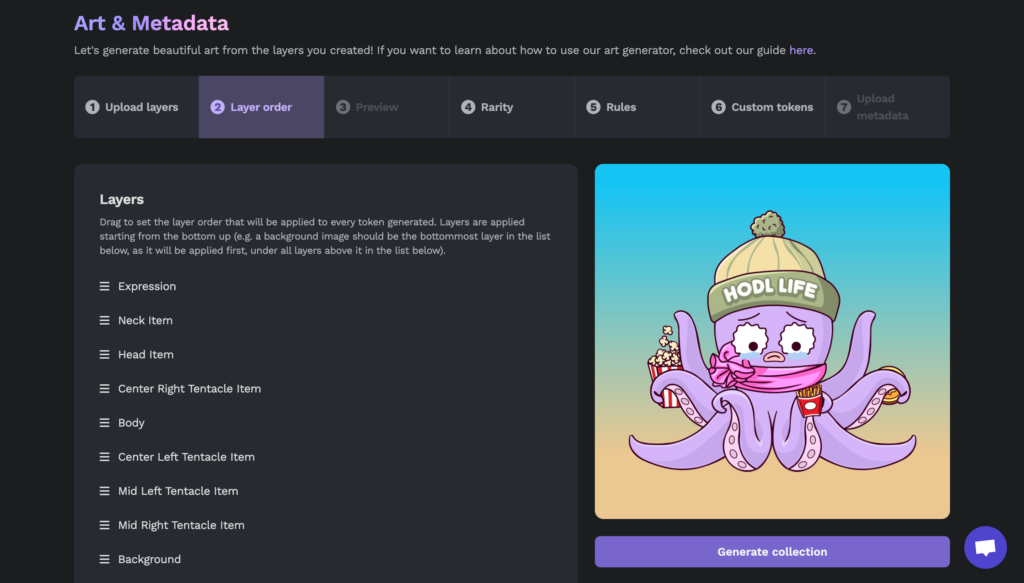
When you’re happy with things, select “Generate collection” and the art generator will begin generating your tokens.
14. Preview Your Tokens
You’ll now be presented with a small selection of your generated tokens. You may edit the token names by clicking on the pencil icon or click next to cycle through your pages of tokens. If you don’t like how your tokens are generating, you can always return to the previous layer order screen and fine-tune your settings.
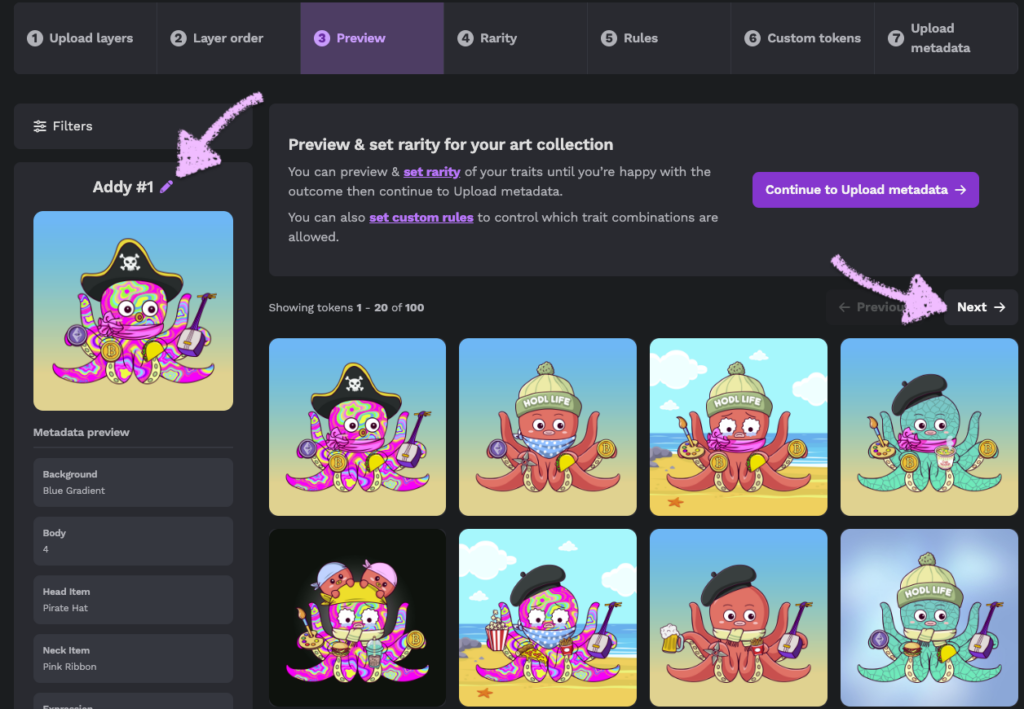
You may notice that if you click on any token on the preview page, it will appear in the upper-left hand corner of your screen, along with the individual metadata of that specific token. You can use this to check that your art and metadata are lining up to your liking.
When you’re content with things, you can proceed through the next steps in order (rarity, rules, custom tokens), or click the “Continue to Upload metadata” button to skip over all of that and head straight to uploading your tokens.
That being said, unless you’re positive that you are not interested in any form of rarity, rules, or custom tokens, we suggest progressing through the suggested flow. To do so, select “Rarity” in the banner at the top of the page in order to head to the next section.
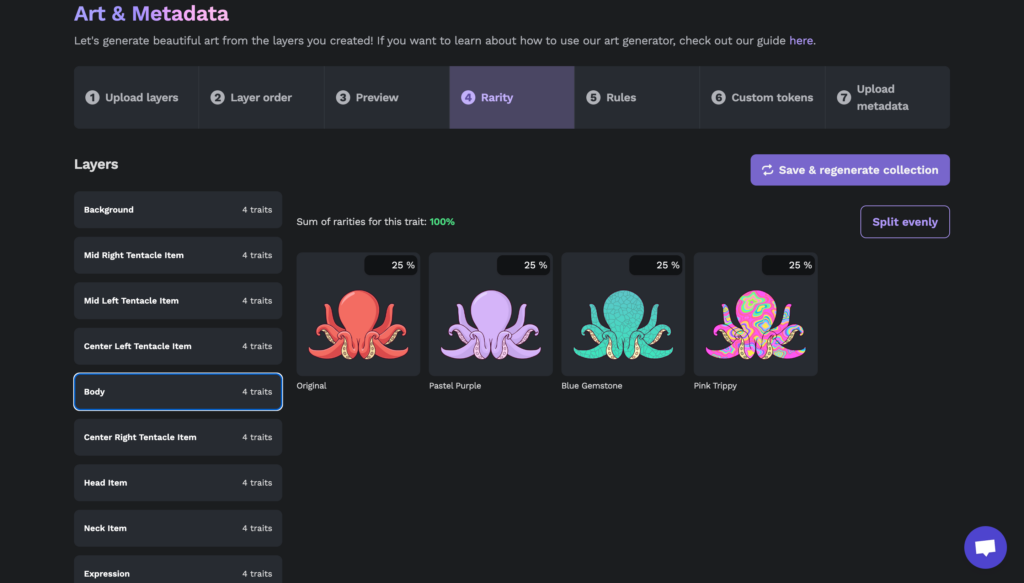
15. Set Your Rarity
The panel of the left contains the various trait layers you have imported, while in the center of the page you will see a preview of whatever specific trait layer you have selected. From here, you may set the rarity however you like: the lower % you make the rarity for an individual trait, the more rare it becomes, as it’ll appear in the collection less frequently.
Note: by default, rarity is split evenly among your number of traits, unless you choose to unbalance it yourself.
If you do alter the rarity of your traits, be sure to click the “Save & regenerate collection” button so that the art generator may reconstruct the collection to your liking.
You’re now set to move onto Rules. Select—you guessed it—”Rules” from the banner.
16. Set Your Rules
Rules are useful for fine-tuning which traits can appear together, and which cannot.
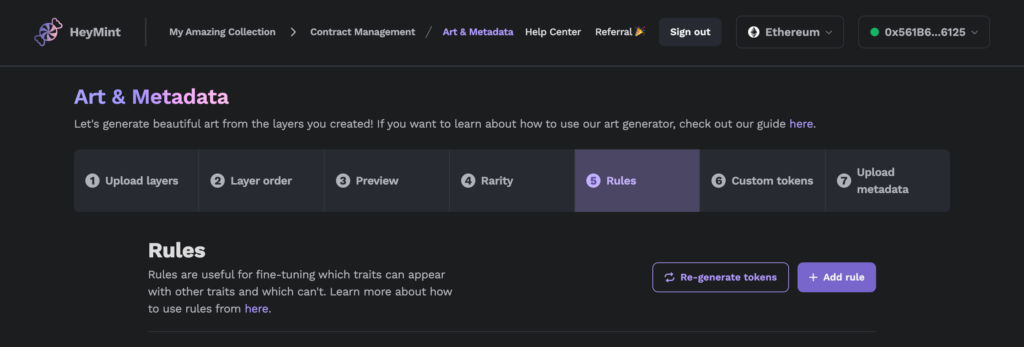
When you click “Add rule”, a pop-up will appear which’ll allow you to begin setting specific rules for your collection. These rules are:
– only appears if token has
– never appears if token has
– always appears together with
– always appears with at least one of
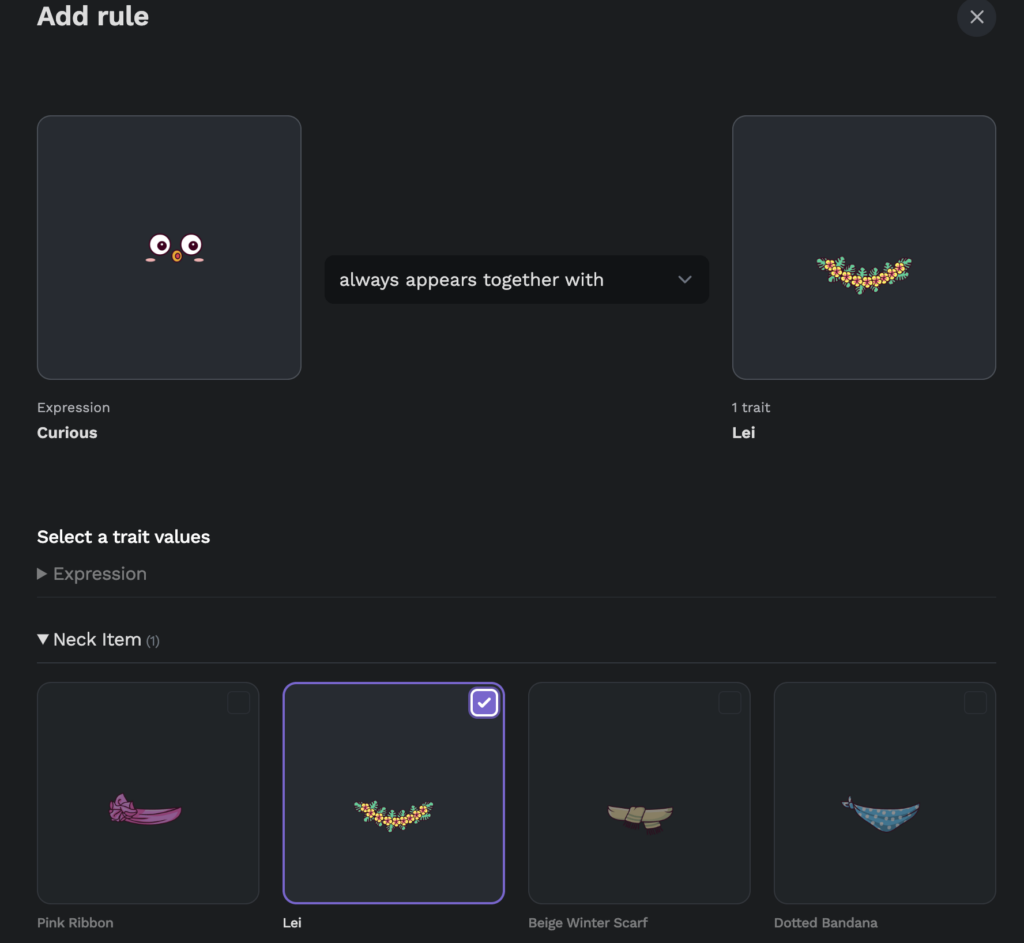
After you add a rule, it’ll appear in the dashboard.
In our example above, we’re setting a rule that the curious expression of our tokens will only appear if that token also has a lei trait. These customizations enable you to further guide and refine the art generation process to specifically generate your ideal token types.
If you do add rules, don’t forget to click the “regenerate tokens” button afterwards, so that it can apply the new rules for your collection. When you do so, it’ll bring you back to the preview stage of the process.
For a more detailed breakdown of how layer rules work, check out our article, “Using NFT Art Generator Layer Rules to Create Your NFTs!“
When you’re all set, you can move on to “Custom tokens”, at the top of the screen.
17. Upload Custom Tokens
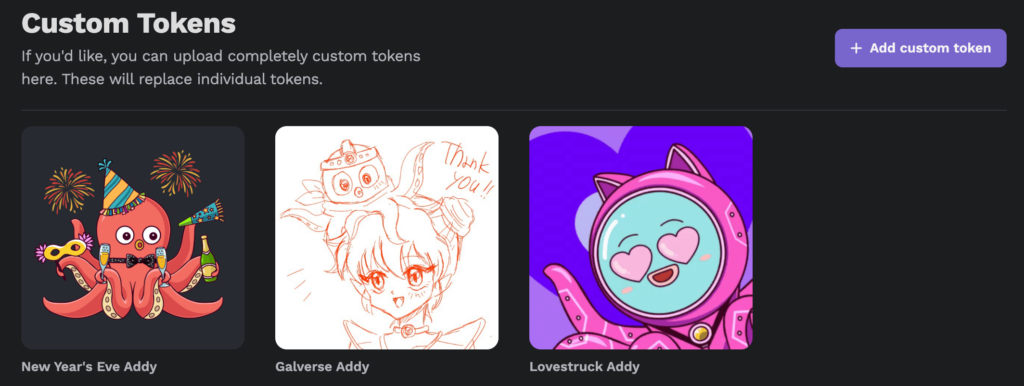
If you wish to replace a number of your generated tokens in your collection with your own unique and customized tokens, here is the place to do so. Simply select “+ Add custom token”.
When you do, you’ll be prompted to upload a custom token art, and custom token name.
If you wish, you may also add unique qualities for your token by selecting “+ Add attribute”. If you do this, you will need to specify a trait type (i.e. Color) and trait value (i.e. Blue) for your attribute.

You can see in the case of New Year’s Eve Addy, that we added a trait type called background and a value called fireworks.
You may then specify where your custom token will appear in your collection: at the start, randomly inserted, or by manually specifying the edition # (selecting an exact token from the collection).
When you’re done, click “Add custom token” to save it to your collection. It will now appear on the screen in front of you.
When you’re finally set with your custom tokens, you can move on: select “Upload metadata” to head to the next section.
18. Upload the Metadata
Now is when it all starts to come together. If you used Launchpad to generate your tokens, we’ll handle uploading your tokens and metadata to IPFS automatically.
Click the “Upload tokens & metadata to IPFS” button to get started.
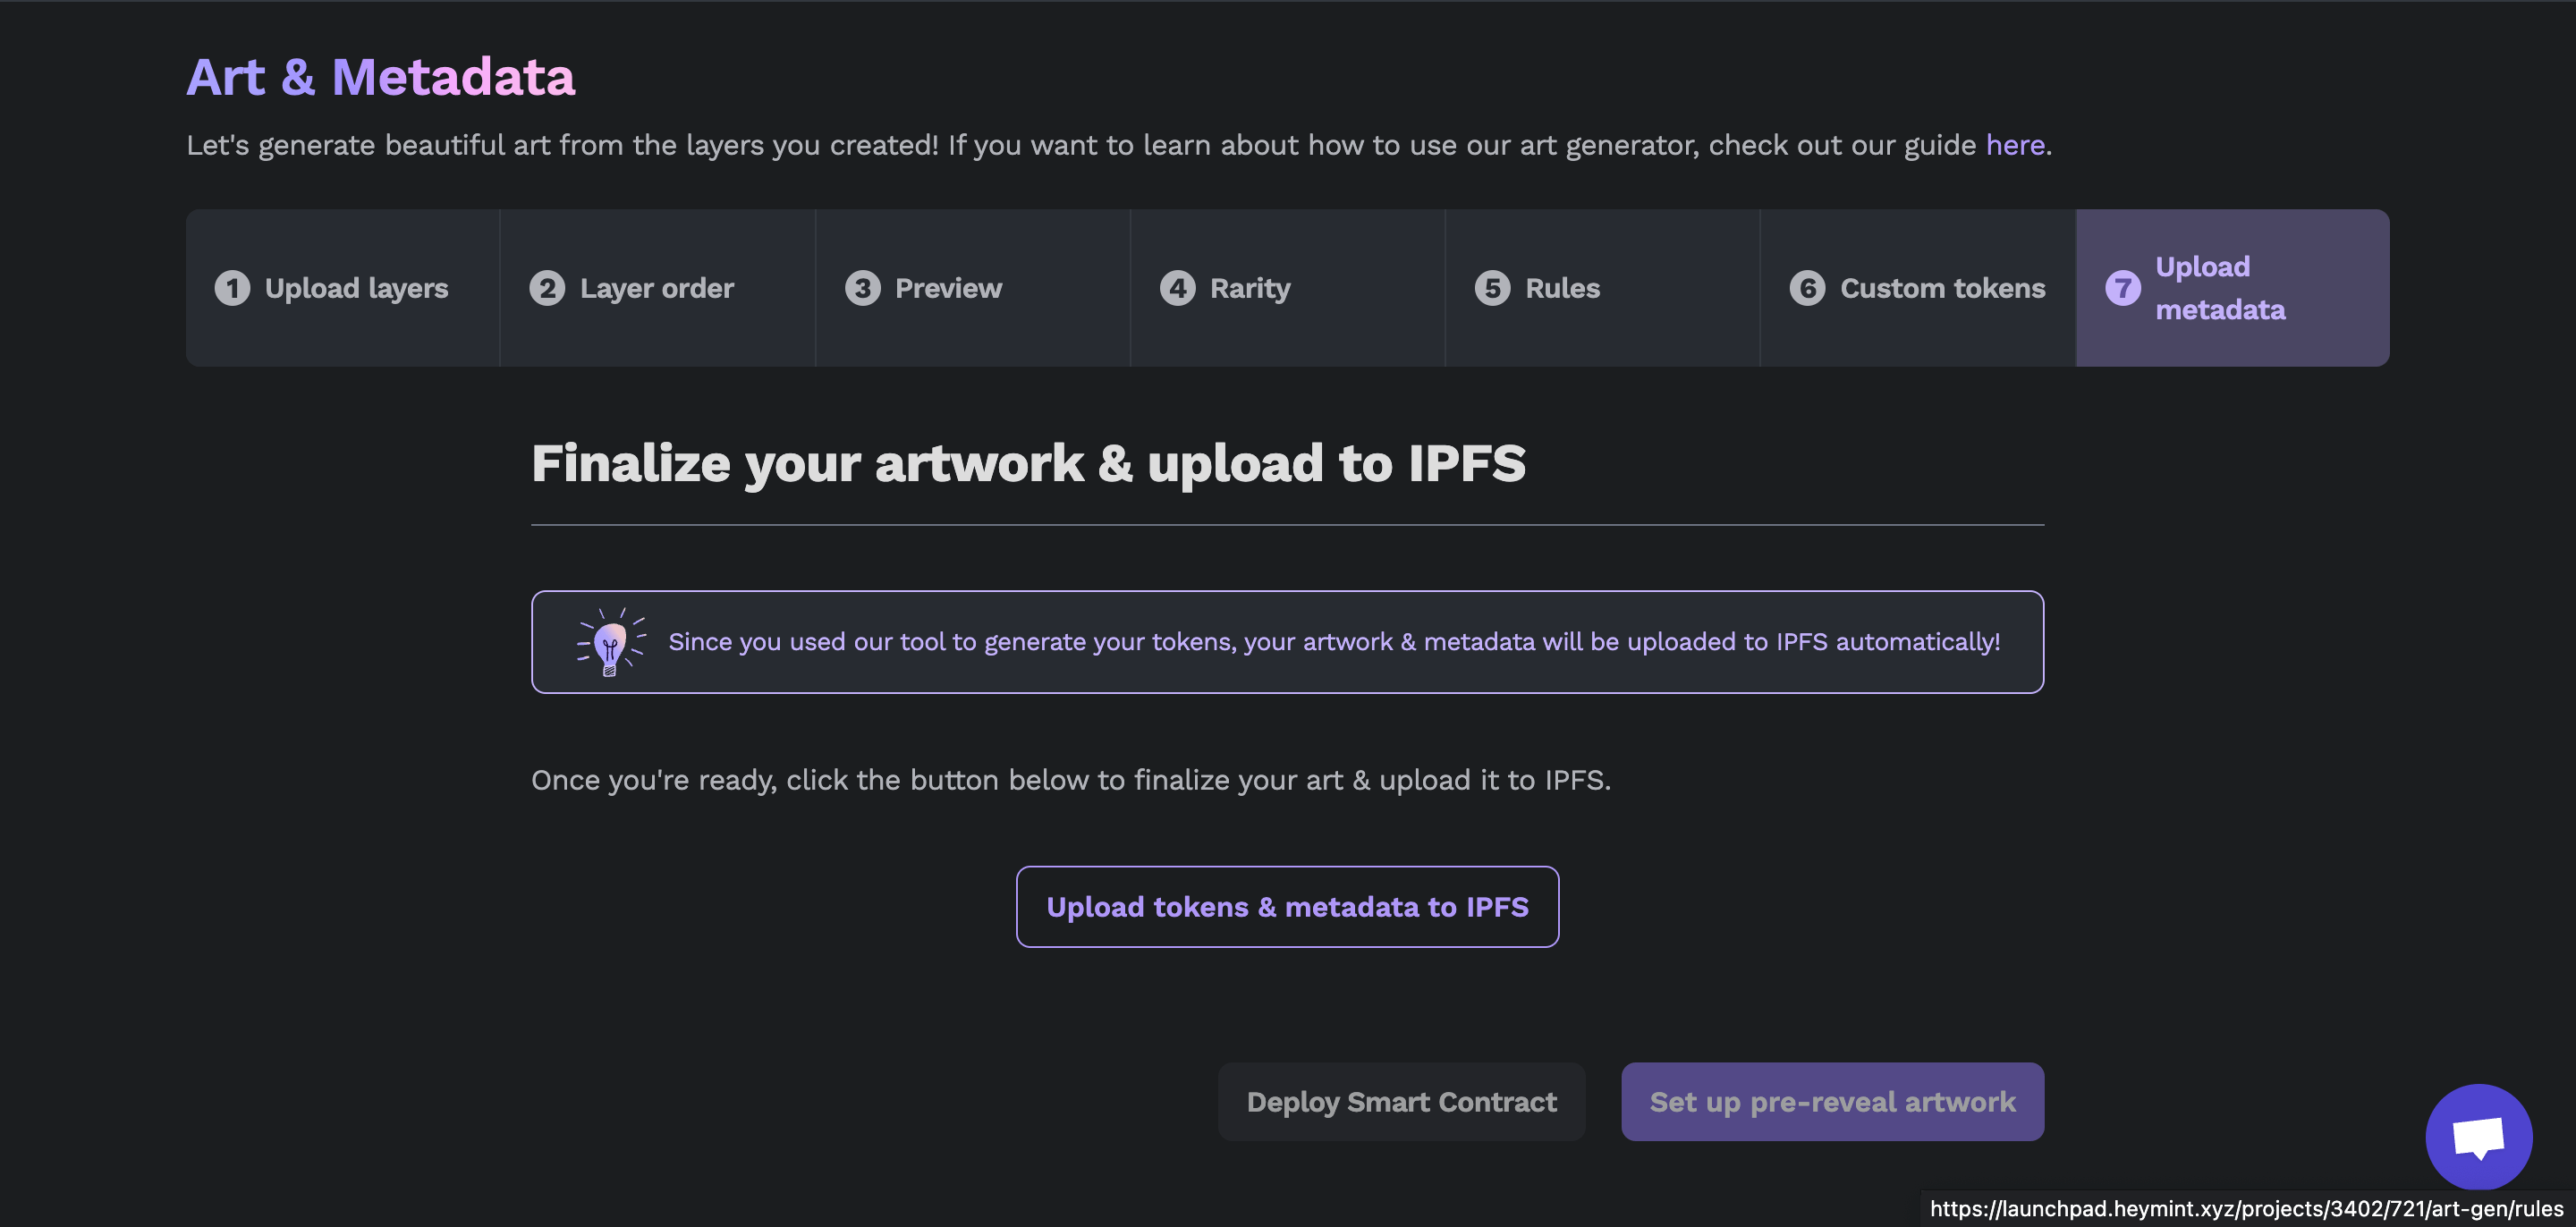
Your tokens will then begin to generate. This may take a bit of time, depending on IPFS, as well as the size and complexity of your collection. A bar will appear at the bottom of your screen to show you how things are progressing

While that’s happening, you may proceed onwards. You are given the option of going straight to “Deploy Smart Contract”, or “Set up pre-reveal artwork”. For the purposes of our walkthrough, we’ll set up a pre-reveal artwork by selecting the button below the token generation progress bar.
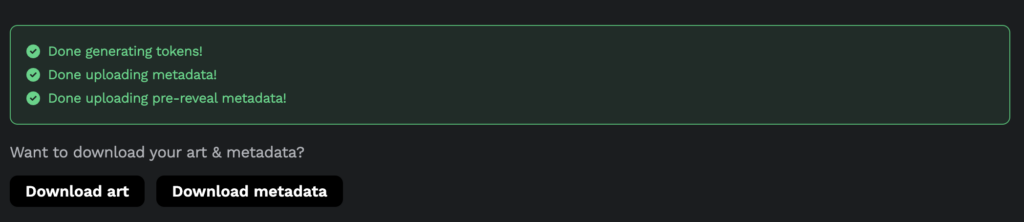
PS: if you return to this screen after the upload is complete, you will also have the option of downloading your art and metadata for offline storage as well.
19. Set Up Pre-Reveal Artwork Metadata

While this stage is entirely optional, many creators like to set a pre-reveal artwork for their collection. This is when your NFTs display a placeholder image at first, before the true NFTs are eventually revealed. There are two big reasons why we recommend you set a pre-reveal image.
The first reason is to prevent collectors from gaming the mint. If all the NFT images and metadata are revealed at the time of mint, sophisticated collectors can scrape the data for all NFTs, even the ones not yet minted. They can then use a bot to programmatically snipe very rare NFTs at the time of minting, or shortly after on secondary markets.
The second reason to set up pre-reveal artwork is to have an event (the reveal) around which to build momentum and hype for a project after the mint concludes.
We highly recommend using a pre-reveal image/animation for the first reason, at least.
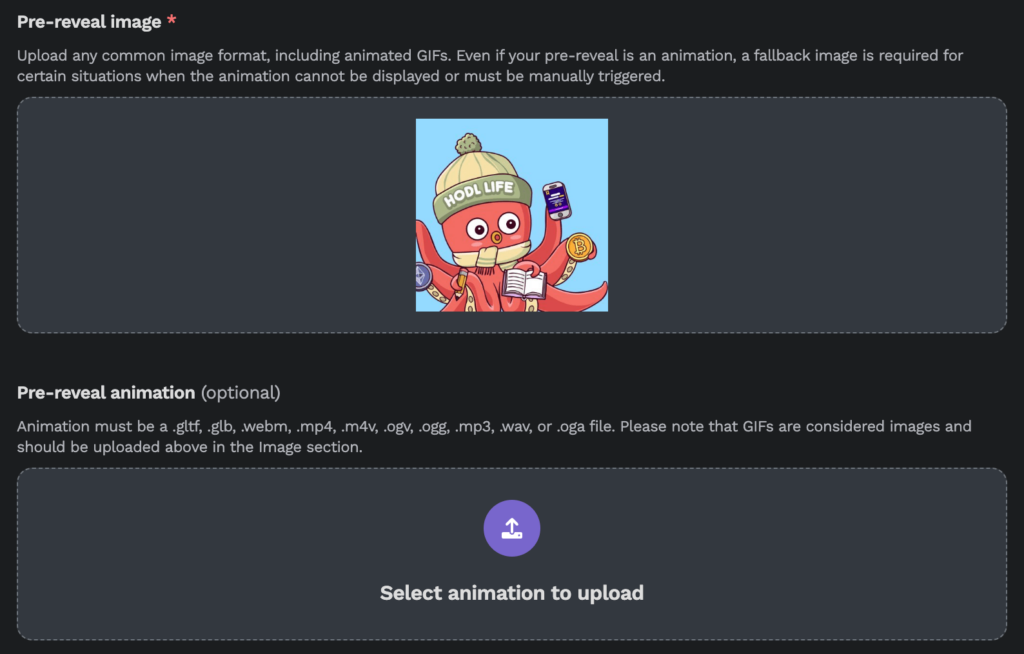
When uploading a pre-reveal, you can choose to upload either an image or animation:
Image: any common image format, including animated GIFs. Even if your pre-reveal is an animation, a fallback image is required for certain situations when the animation cannot be displayed or must be manually triggered.
OR
Animation: must be a .gltf, .glb, .webm, .mp4, .m4v, .ogv, .ogg, .mp3, .wav, or .oga file.
(Please note that GIFs are considered images and should be uploaded above in the Image section).
When you’re finished, click the “Save & Deploy Smart Contract” button. This will take you to the deploy page of the Contract Management Dashboard.
20. Double Check Settings and Import Allowlist Entries
While you could deploy your smart contract right now, there are a few things we recommend checking beforehand, as well as some additional features you may not be aware of:
– Check the sale, general, payout, and advanced pages to see if there are any additional changes you wish to make, or features/settings you wish to enable.
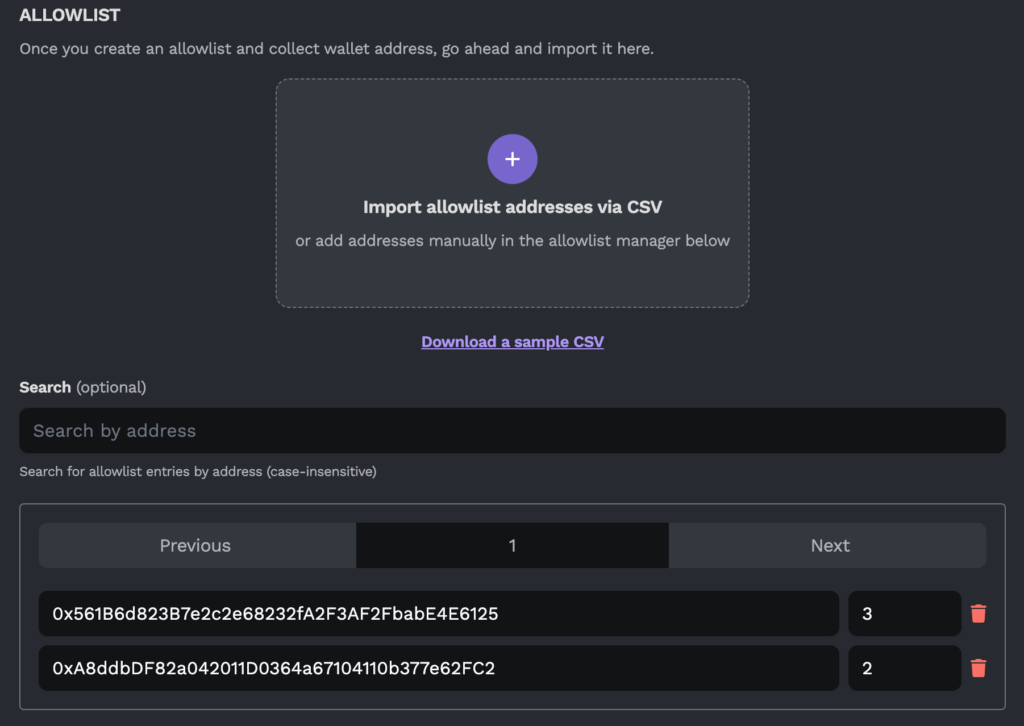
– The sale page has a section called Allowlist, where you can automatically import a .csv of allowlist addresses you have gathered, or manually add addresses yourself. You may specify the max mint for each address, or set a bulk change (a new quantity to set all your allowlist entries to). If you leave this empty, it will default to your per-wallet limit (if applicable).
– The payouts page can allow you to add more payout addresses for your primary sales, split to any percentage among the addresses that you wish
21. Decide On If/How You’re Enforcing Royalties
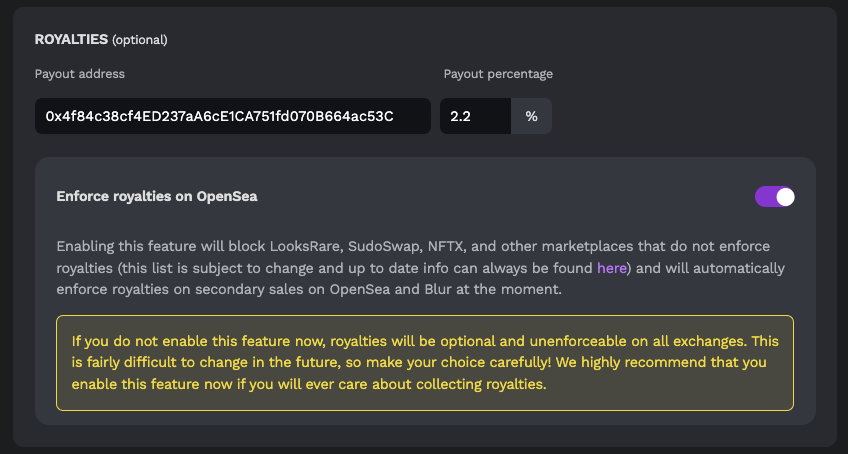
The payouts page also has a section where you can (optionally) enforce royalties on OpenSea. Enabling this feature will block LooksRare, SudoSwap, NFTX, and other marketplaces that do not enforce royalties (the blocklist can and does change quite frequently: for the most up to date info, you can check this list here), and will automatically enforce royalties on secondary sales on OpenSea and Blur at the moment.
If you do not enable this setting at the start, royalties will be optional and unenforceable on all exchanges. This is fairly difficult to change in the future, so make your choice carefully! We highly recommend that you enable this setting if you care about ever collecting royalties.
22. Advanced Features
Selecting “advanced” from the Contract Management Dashboard will allow you enable all sorts of advanced features for your collection. Please note that we do not yet provide frontend functionality to support these advanced features. If enabled, you will need to implement the frontend that interacts with these features yourself.
The advanced features available to our users include: soulbinding, credit card payment (beta), staking, refund, loan, free claim, burn to mint, and random hash. A brief description of these advanced options can be viewed in the photos below.
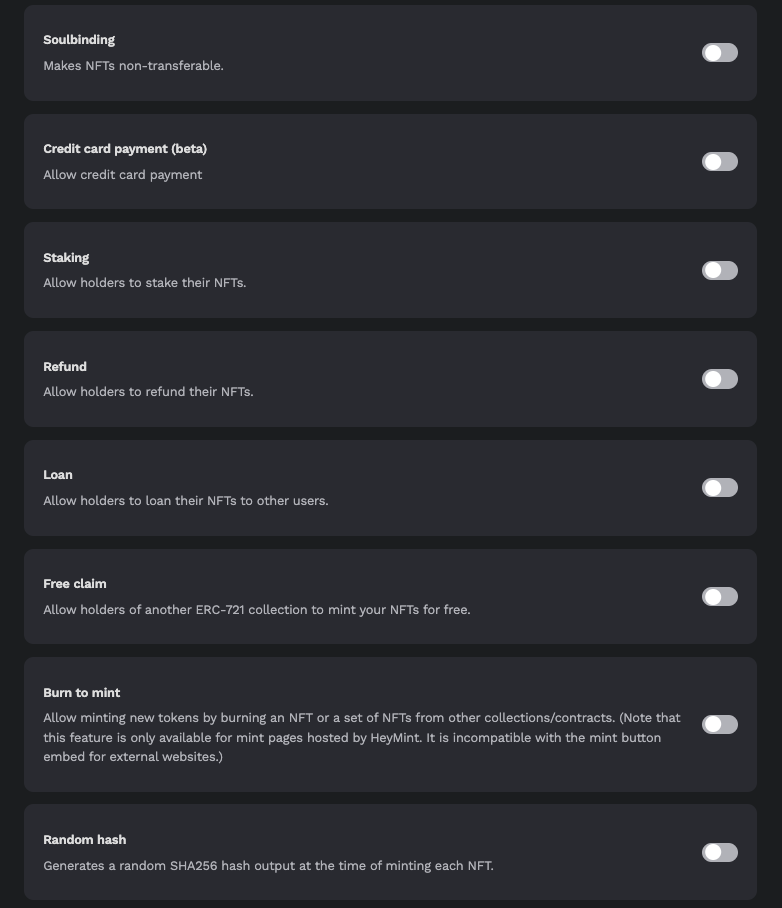
You can click here to read about these advanced features in greater detail.
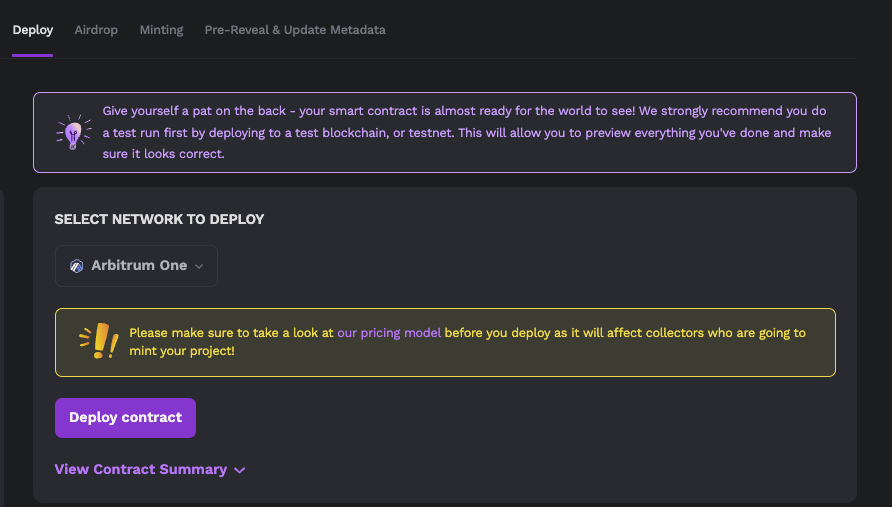
23. Deploy Your Smart Contract (on Testnet)
If you’ve gone over all the features and the contract management options, made your choice regarding enforceable royalties, and decided on whether or not you’ll be integrating advanced features, then you’re ready to make a testnet deployment of your smart contract. Click on the “Deploy” button on the Contract Management Dashboard to get to the right page. From there, you can select “Deploy contract”.
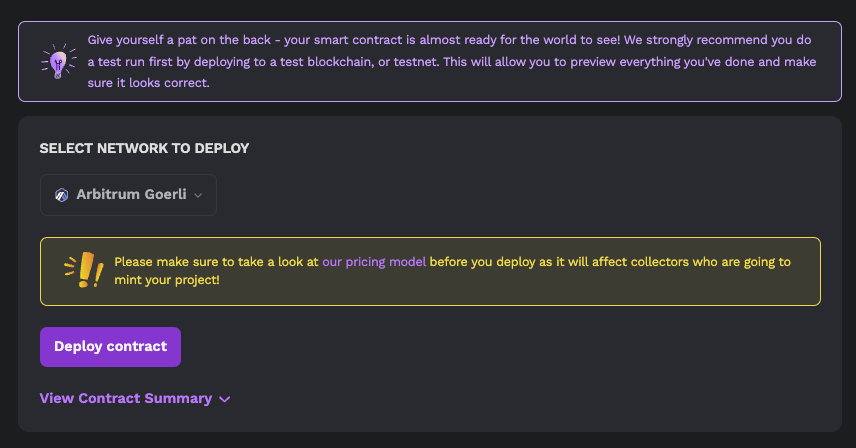
Note: if you are on the wrong network (like Arbitrum Mainnet), we will warn you and advise that you should put your collection on a testnet (like Arbitrum Goerli) first. You can bypass this, should you choose, but we don’t recommend it. Remember: it costs actual money to deploy on a real blockchain. In most cases, it’s best to see how things turn out on a free testnet deployment before launching the real deal.
Before your contract is deployed, you click on “View Contract Summary” where you can review all the pertinent details of your collection.
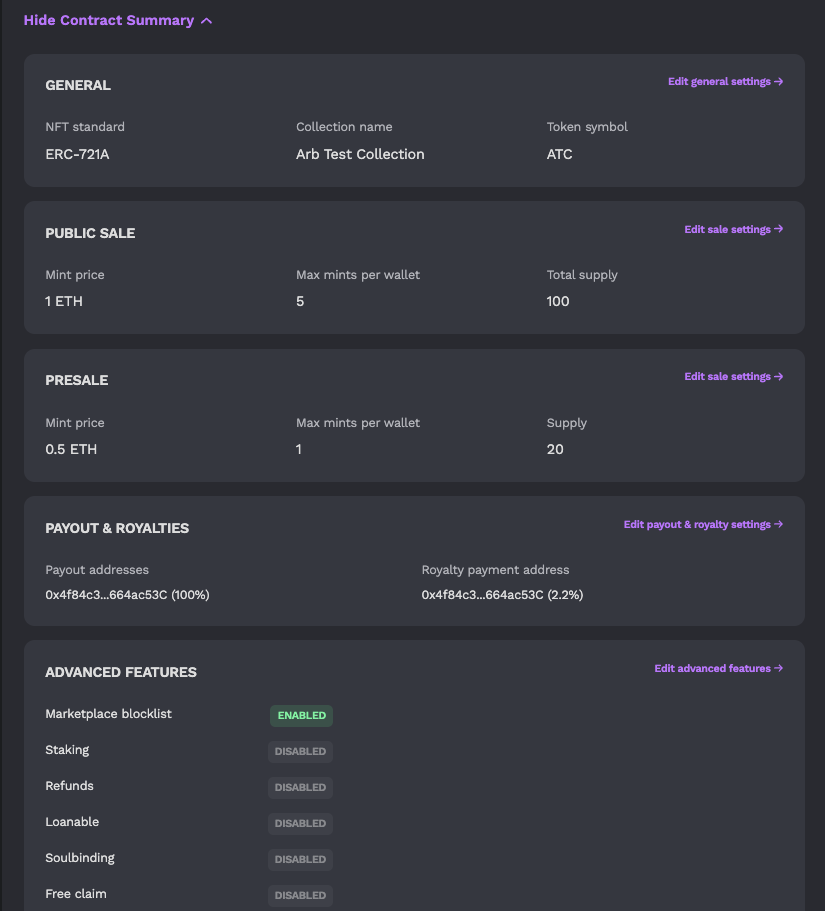
If you’re happy with everything, click the “Deploy Contract” button.
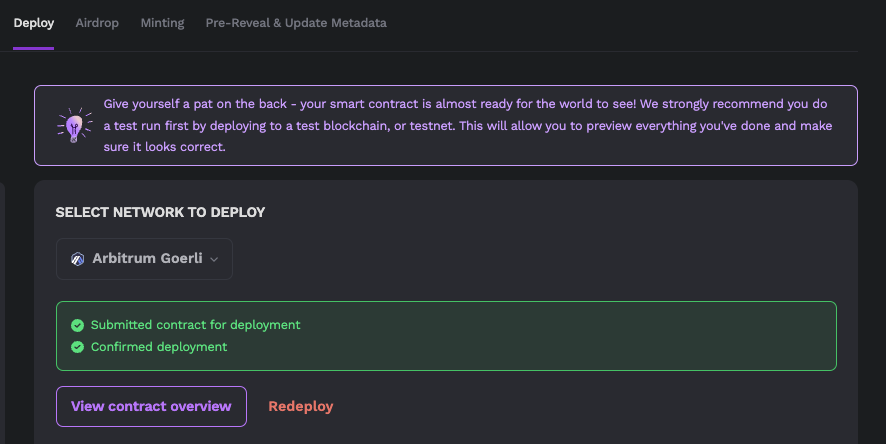
Next, click “View contract overview” to be transported to the overview page on your Contract Management Dashboard. We suggest selecting “Verify now” next to “Arbiscan verification”.
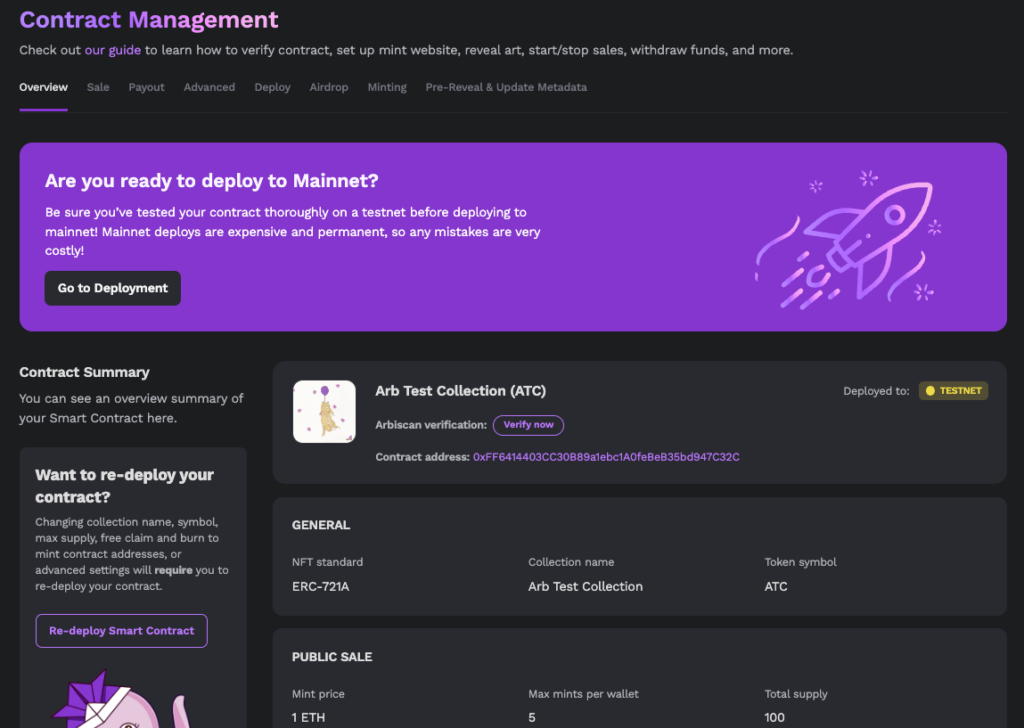
Once your contract is verified, you’ll see a checkmark next to “Arbiscan verification”.

24. Test Post-Deployment Functions: Mint Page/Embed, Gift/Airdrop, & Reveal Art.
Build a Minting Page
From the Contract Management Dashboard, select “Minting”. From there, select the “Minting page” button.
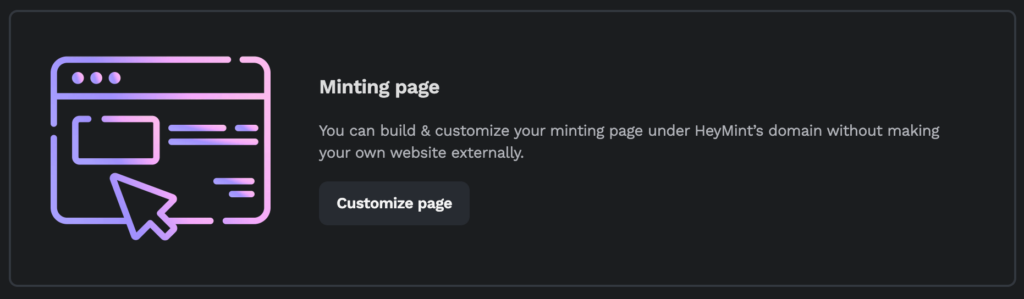
This is a place for you to build and customize a minting page directly within Launchpad and under HeyMint’s domain. This means that you can easily set up and share a page for your followers to mint from, for when you launch your collection and enable sales.
Simply upload an image to serve as an avatar for your collection, set a background image for your mint page, choose a title, and enter a description of your collection to share with your followers. For Opensea slug, you can come back and add it later when your collection is showing on Opensea after an NFT is minted or airdropped. If you want some extra visibility, ensure that the “Feature on HeyMint” toggle at the bottom of the page is enabled. This will allow for increased discoverability within our platform (if you’re releasing something secretly or privately, you can also choose not to enable this).
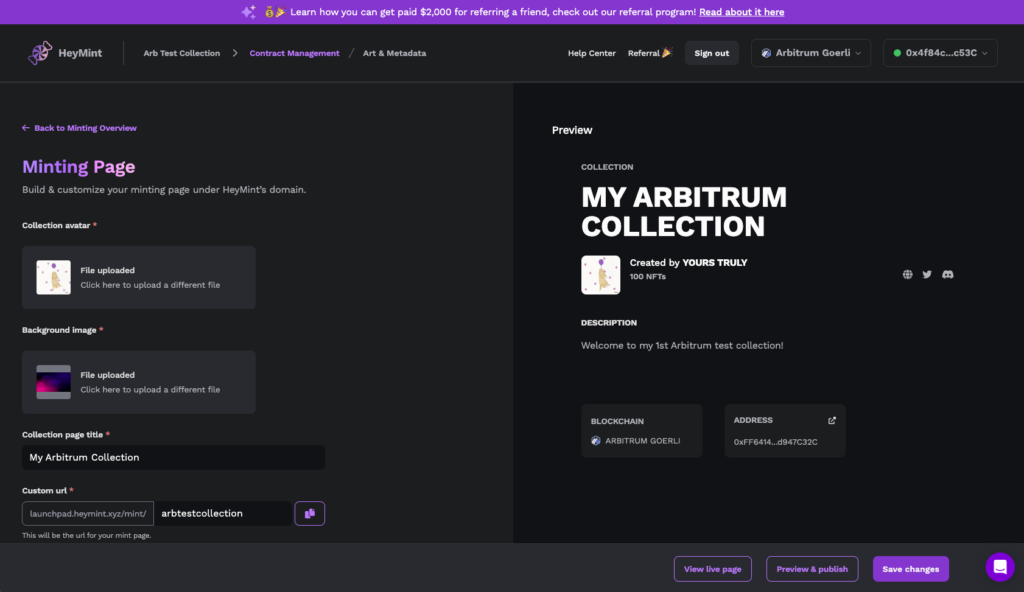
Click “Save changes” when you are good, and select “Preview & publish” to see how your mint page will look before you publish it.
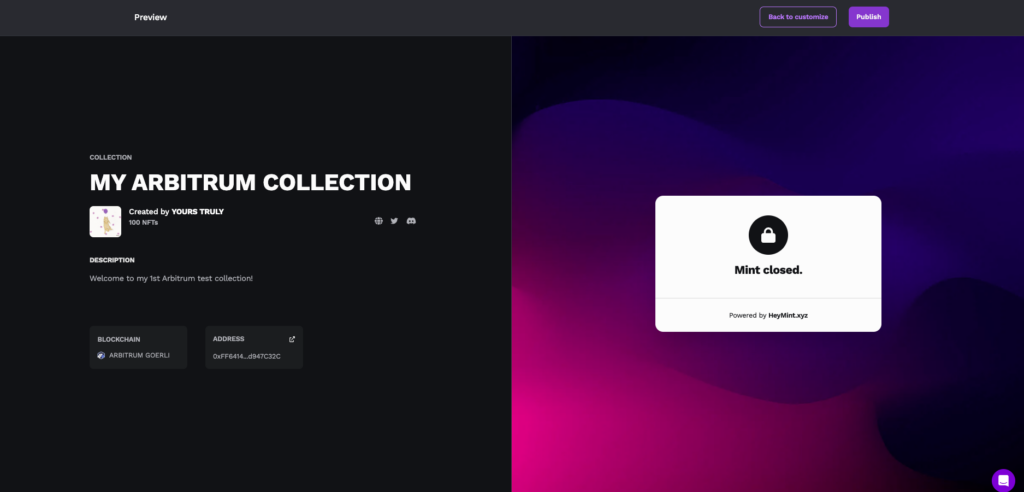
Note: even after publishing, nobody will be able to mint from your collection until you turn on the presale/public sale. Until then, visitors to your minting page will be met by a “Mint closed” description, as in the photo below.
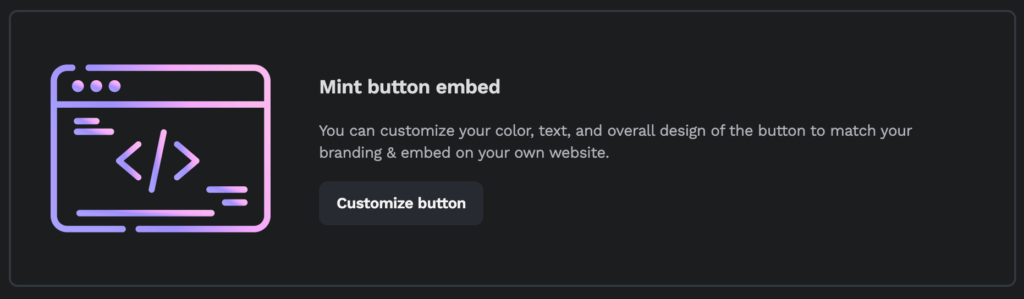
Alternate Path: Build a Mint Button Embed for Your Website
If you prefer, instead of building a minting page within Launchpad, you can make a custom mint button which you can then embed on your website. Once again, from the Contract Management Dashboard, select “Minting”. From there, select the “Mint button embed” button instead.
Fully customize your button including its background color, text color, font, radius, and label (the text that appears on the button). You can reference this color chart when selecting background/text color codes.
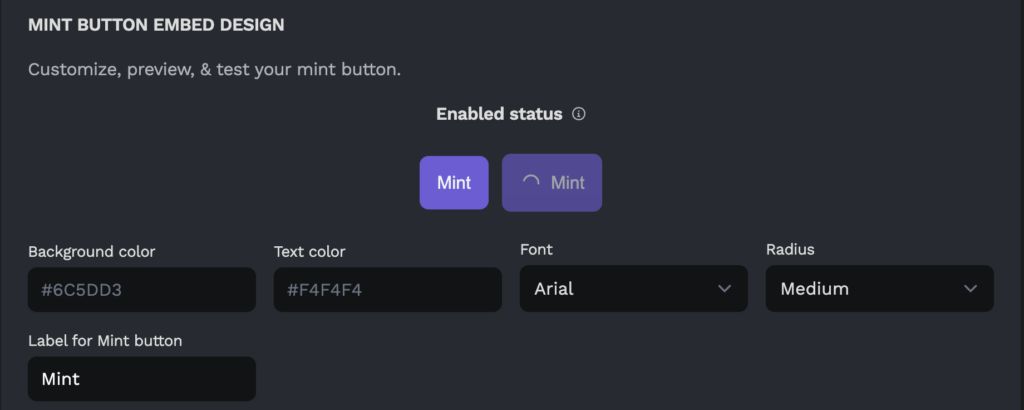
As you will see, you can set a custom look for both the enabled and disabled status of your mint button embed. This is useful to let your visitors know the current status of your mint
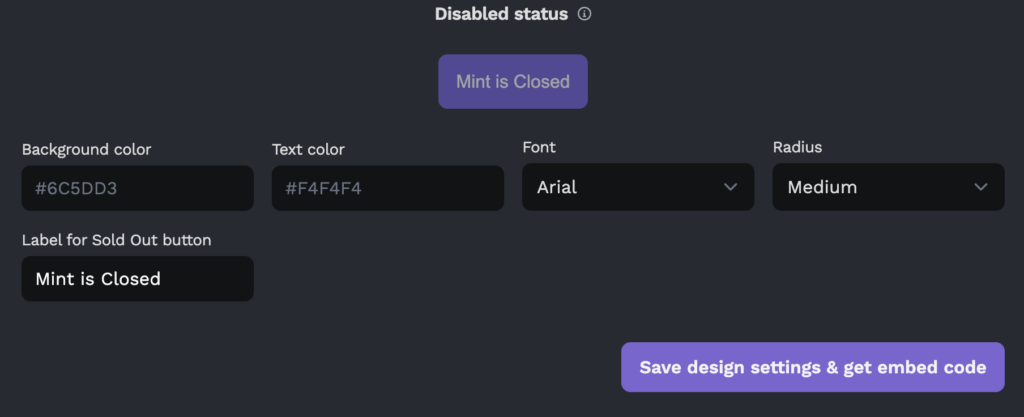
When your enabled and disabled mint button embeds are configured to your liking, select “Save design settings & get embed code”.
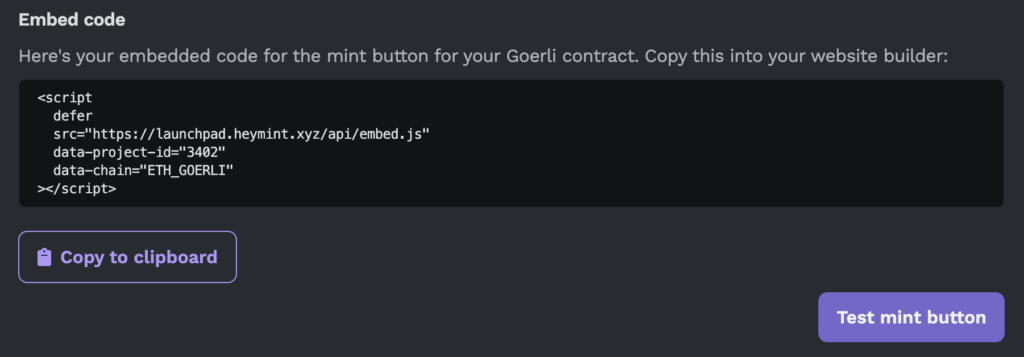
Click “Copy to clipboard” to copy your mint button embed design and information, which you can then import and paste into your website builder. There is also a “Test mint button” should you wish to once again check how your mint button will appear to visitors.
Import Gift/Airdrop Addresses
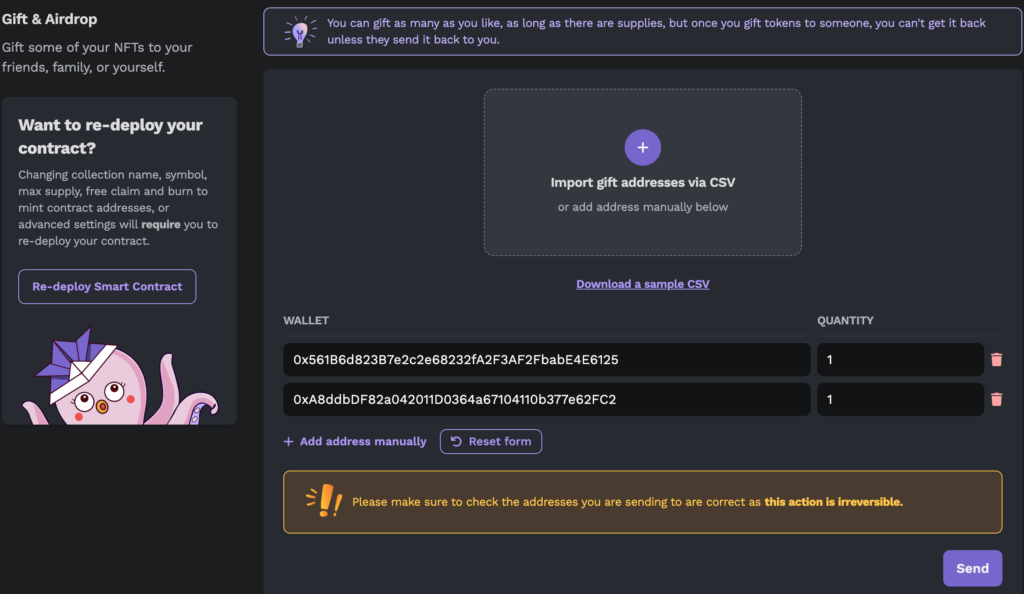
From the Gift & Airdrop page, you can automatically import entries for your collection via .csv (seem familiar? It’s the same procedure you used when setting up your allowlist). Alternatively, you may add addresses manually. In either case, make sure to specify the quantity of gifts/airdrops any given address will receive from your collection.
When you’re all set, click “Send”. Please be advised that this action is irreversible: there is no undo button for once tokens have already been sent.
Note: We are charging 0.00007 ETH/~$0.1 per token for airdrop/gift tokens (so if you want to airdrop 10 tokens, it will cost ~$1).We are charging 0.00007 ETH/~$0.1 per token for airdrop/gift tokens (so if you want to airdrop 10 tokens, it will cost ~$1).
Reveal Art
With the simple press of a button, you can change your collection’s pre-reveal art to it’s actual art. For advanced users, we also enable you to set your token base URI manually.
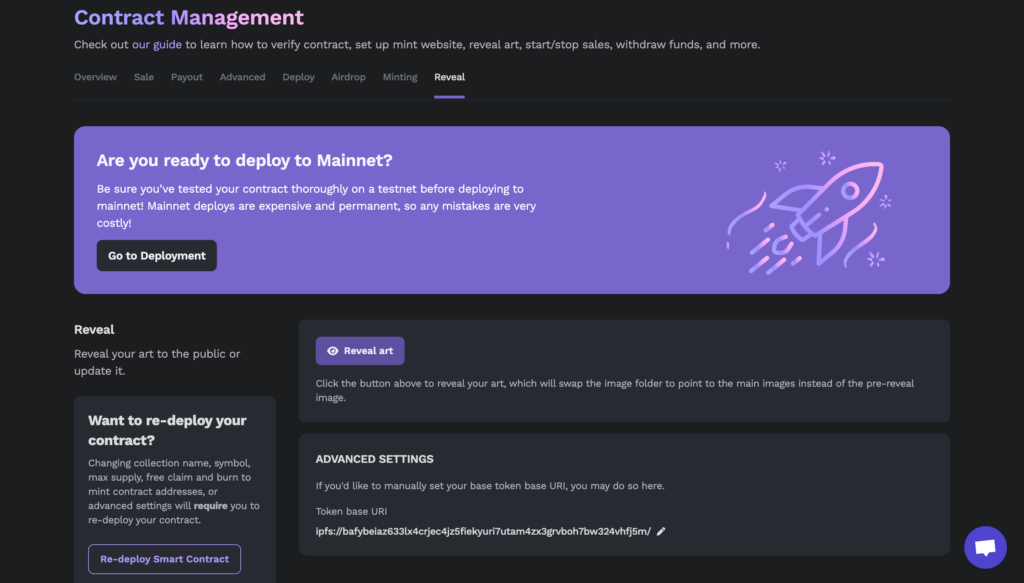
When the time is right, select the “Reveal art” button to unveil your lovely art for all of your collectors!
If you’re happy with your mint page or mint button embed, have tested gifting/airdrops, and have revealed your art (replacing the pre-reveal art) there’s nothing more to do here. You’ve officially tested all that you can. Hooray!
25. Deploy Your Smart Contract (on Mainnet)
So you’ve thoroughly tested your collection on testnet and have ensured that everything is working properly. Wonderful! Now it’s time to deploy your contract for real! Once again, as deploying on Arbitrum Mainnet will cost actual ETH, not testnet ETH, make sure that you’ve configured your collection to your heart’s content. While some settings can be adjusted after deployment, many things cannot be changed without a gas charge, and a few things simply can’t be changed at all.
If you have any doubt as to whether things are configured properly or not, go back to testnet testing.
But if you are all set, you may now deploy your collection by clicking “Generate smart contract”, this time on your intended blockchain. You will incur a charge when deploying your smart contract: this fee is not paid to us; it is simply the cost of deploying something onto the blockchain.
Once deployed, you can set up and share your mint page for real, begin gifting/airdropping NFTs if you so wish, open or close your presale/public sale, and work with your community towards an eventual reveal of your collection’s art.
26. How to Withdraw Your Funds
After your contract has been successfully deployed, you will have access to the withdraw function for your collection. To withdraw your funds at any time, select Sale from the Contract Management Dashboard.

From here, you will see a quick overview of your tokens and their balance accrued thus far.

After clicking the withdraw button, you will once again see the the amount of revenue your tokens have earned, as well as the wallet address tied to the account. If you’re ready, select “Withdraw Funds”.
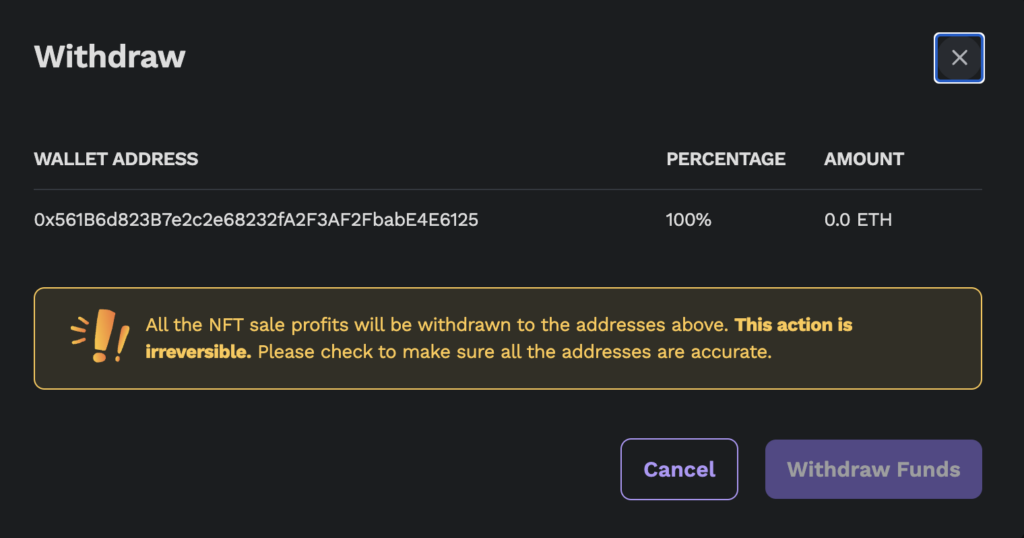
(Note: you will be prompted to pay a small gas charge in order to process your transaction. Doing so will withdraw your total available balance to your designated wallet. This action is irreversible, so please make sure that you have verified your address before withdrawing)
And that’s it! I know we went rather in-depth, so if you’re still here, thank you for sticking with us 💜

If you have any questions about using Launchpad, please share them with our team by connecting with us via the HeyMint chat widget on our website.
And as always, thank you for using HeyMint 🍬