
After we’ve launched the easiest and only free tool for creating and launching an NFT collection from start to finish (art generation, smart contract, minting button and all), HeyMint Launchpad, we’ve seen many creators getting confused about NFT metadata and how it works.
So we decided to write a comprehensive guide that covers what is NFT metadata, how to create one, and how to create a batch so that NFT creators can understand further and avoid making critical mistakes.
Understanding NFT Metadata
So first — what exactly is NFT metadata, and how can you generate your own for an NFT collection?
NFT metadata, in short, is your NFT — it’s just a text file, structured in a JSON file format that’s easy for computers to read and understand, that describes everything about what your NFT is — the name of the NFT, the description of the NFT, the attributes/traits of the NFT, and perhaps most importantly, a link to the image or animation your NFT represents.
Let’s go take a gander at an example of a real life NFT metadata file from our very own NFT collection, Curious Addys!
So here’s a nice Curious Addys, #1000, on OpenSea:

And here’s the metadata file that represents this NFT:

At first, this might look overwhelming and very confusing to read — but if we take it one step at a time, it’s actually super easy!
JSON stands for JavaScript Object Notation, and it’s just a computer-friendly way of storing information that also happens to be reasonably human-readable.
JSON consists of key value pairs, and we can see plenty of examples here, where keys are things like “name”, “description”, and “image”, and the values for each of those keys are in this case “#1000”, “Curious Addys’ Trading Club”, and “ipfs://QmP9ayW28pbW2V9nYAjEbxv45MTezQpz8S913VbV56nkCg/1000.png”.
What’s amazing is we can see that’s exactly how OpenSea knows exactly what to display on their page!
- The name shows up as #1000 because that’s what the value is in the JSON file
- the description says Curious Addys’ Trading Club
- the image shown on the page is pulled directly from the IPFS link in the metadata
- all the “attributes” correspond perfectly to the “trait_type” for the name of the attribute and the “value” for the value of the attribute for the given NFT:

Cool — so that’s NFT metadata in a nutshell :). Tl;dr — NFT metadata defines everything about your NFT, so you absolutely must make sure to get it right otherwise everything will be a disaster :).
So, without further ado — let’s walk through how to create metadata easily and correctly!
Creating Metadata
So if you were to create a metadata file all by yourself from scratch, you’d follow precisely the example above. OpenSea has a great example on all the relevant fields you can add, but at a minimum, you’d want a name and an image, and maybe a description and maybe an animation_url if you’re making an animated piece.
Here’s one of the simplest metadata files in JSON format you could create:
{
  "name": "My First NFT #1",
  "description": "This is my first NFT ever!",
  "image": "ipfs://bafybeiahfsvde7tjzr3rkk26ullka4w7kajxu3uisbf2yau4ud36vm257q",
}
And if you were making an animated piece, you’d want a static image set under the image key as a fallback whenever the animated piece can’t be displayed and to set the link to the movie/animation under the animation_url key like so:
{
  "name": "My First NFT #1",
  "description": "This is my first NFT ever!",
  "image": "ipfs://bafybeiahfsvde7tjzr3rkk26ullka4w7kajxu3uisbf2yau4ud36vm257q",
  "animation_url": "ipfs://bafybeibsxl3wfckieh6jxaj3l2icfuzwu4g5amhlgz6nh5ihip5mhuk3v4"
}
Now, if you want to get a little more fancy with some attributes that will show up like in the Curious Addys example under the Properties section, just add those like so:
{
  "name": "My First NFT #1",
  "description": "This is my first NFT ever!",
  "image": "ipfs://bafybeiahfsvde7tjzr3rkk26ullka4w7kajxu3uisbf2yau4ud36vm257q",
  "attributes": [
    {"trait_type":"Edition","value":"First"},
    {"trait_type":"Awesomeness","value":"100%"}
  ]
}
And that’s all there is to it! Not so bad again, right? 🙂
Creating a ton of metadata automatically
Okay, but now let’s say you’re making a collection of 1,000 or 10,000 NFTs and you really, really don’t want to be making the metadata for all of those NFTs by hand.
Fear not — first, if you use HeyMint Launchpad’s art generator to create your NFTs, we’ll automatically handle 100% of the metadata generation for you, so no worries there.
But let’s say you’re like our good friend Amber Vittoria, who we helped launch a collection of 999 NFTs made by hand without the help of a nifty art generator, and now you find yourself needing to create 999 metadata files to correspond to your NFTs.
Fear not again — HeyMint Launchpad has an easy solution for this, too! In fact, it’s the exact same system we used for Amber Vittoria when we were launching her collection. She gave us a CSV spreadsheet specifying how metadata should appear for each NFT, and we automatically generated the metadata for her based on that.
Now, you too can do the same when creating a project from Launchpad! Just follow these simple steps:
- Sign up at https://launchpad.heymint.xyz/
- Click “Create a New Collection” and name your collection, then click “Create collection”

3. Click on “NFT art and metadata”
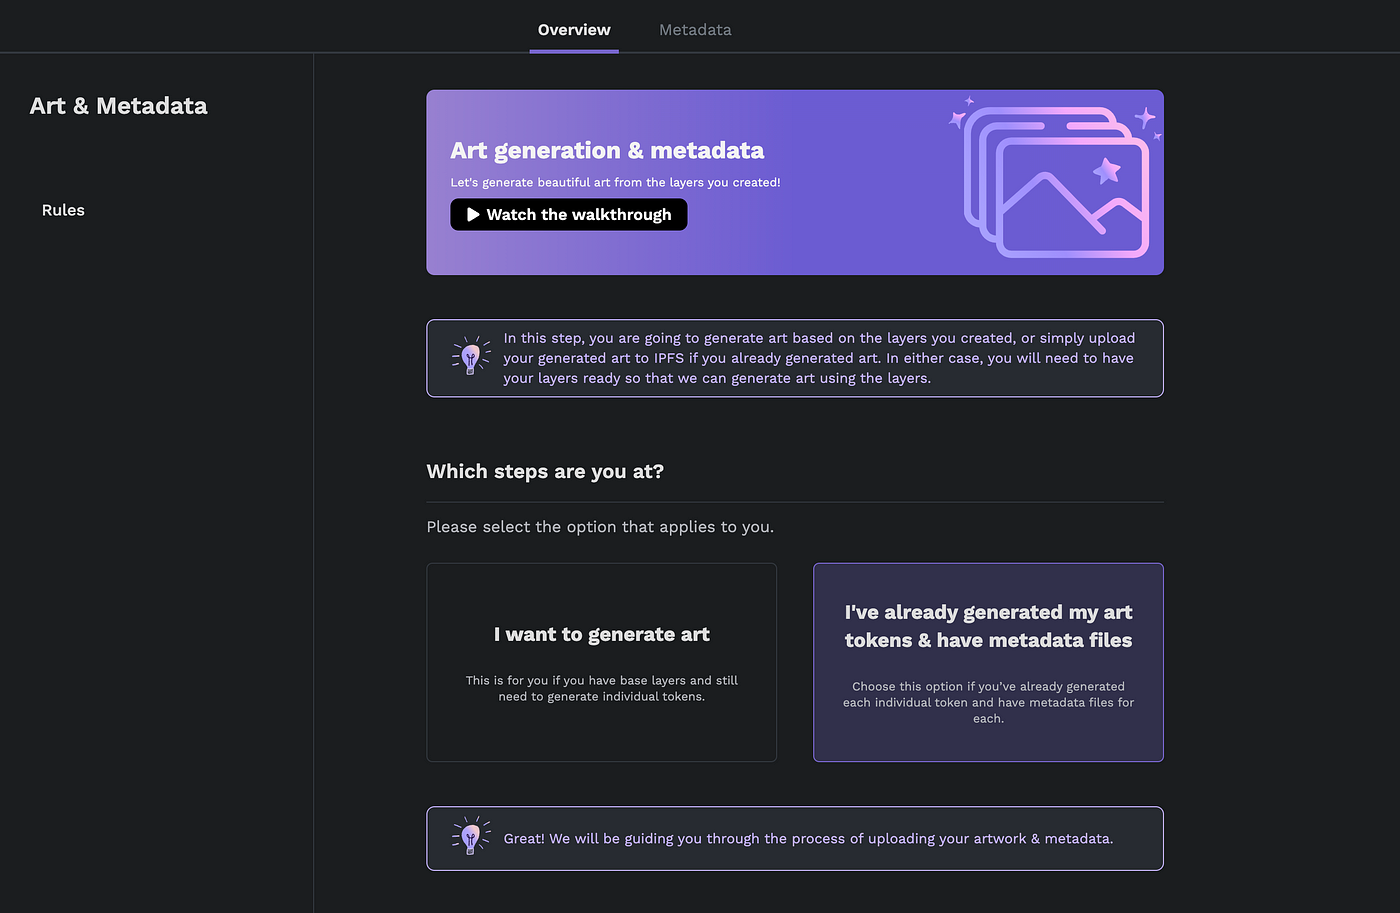
4. Click “I’ve already generated my art tokens & have metadata files” and fill out the simple prompts below to continue to the next step:
5. Now, follow the instructions presented on the page to upload a folder containing all the NFT images you’ve created to IPFS, then add the CID for the IPFS folder of all the images you uploaded and select the Media format that corresponds to the file name for all your images.

Very important note here — make sure to name all your images in some easy sequential manner, like 1.png, 2.png, etc, to make your life a lot simpler later down the line. Your folder of images should look something like this when you browse it on IPFS:

6. Once that’s set, click “Save & Continue” and then upload your NFT.Storage API key following the instructions on the next page:

7. Now comes the big step! Make sure to navigate to the section that says (If you don’t have metadata files):

And here’s where you’ll setup your CSV file! First, take a look at that sample sheet:

Note carefully that there are three tabs — one with instructions, and one example sheet. Let’s take a look at the example sheet, which is pretty self explanatory:

And there we are! Just make a sheet exactly like this, and make sure the filename you set corresponds to the filename of each NFT’s image in the IPFS folder you uploaded earlier in step 5, without the filename extension (since we automatically add that based on what you selected in step 5), and then download the sheet as a CSV:

8. And go back and upload that CSV sheet to Launchpad:
And then check the sample first NFT data as displayed in Launchpad to confirm everything shows up as you expect it to:
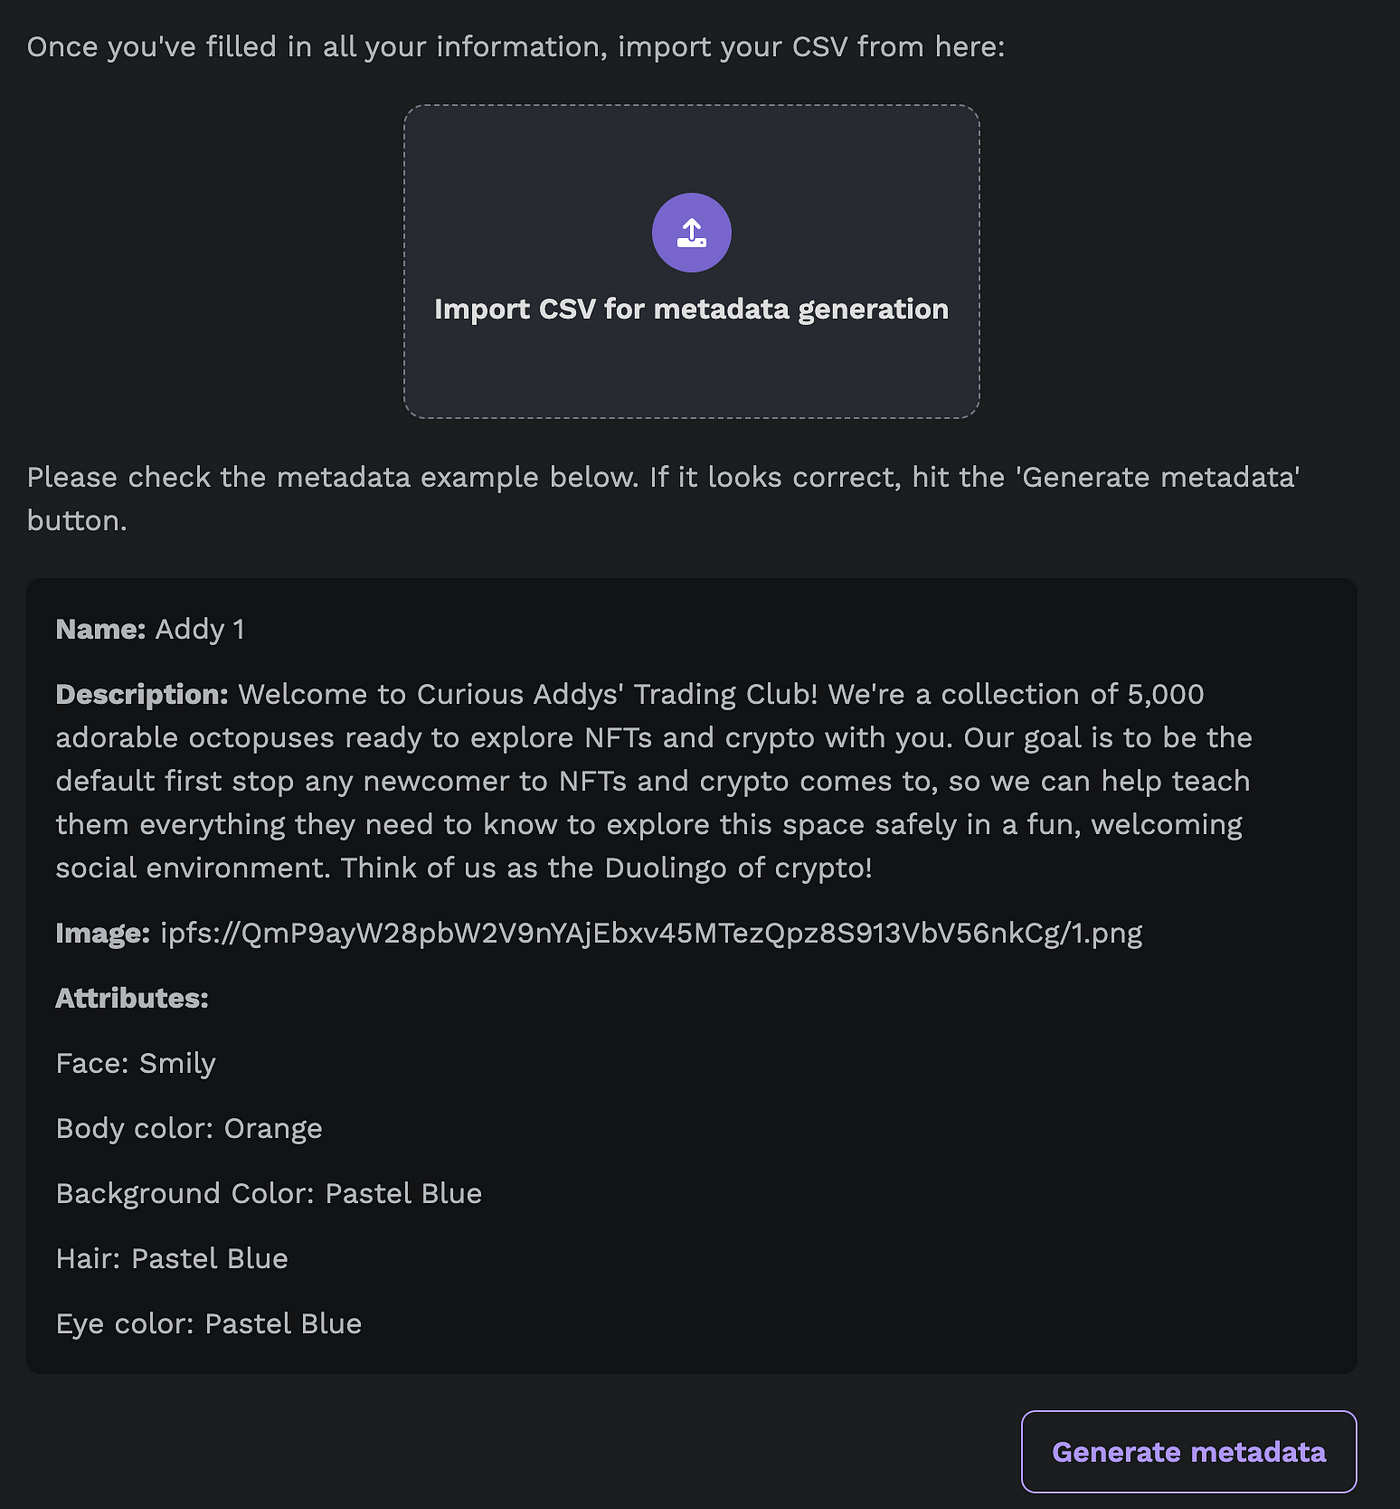
Then click that “Generate metadata” button:
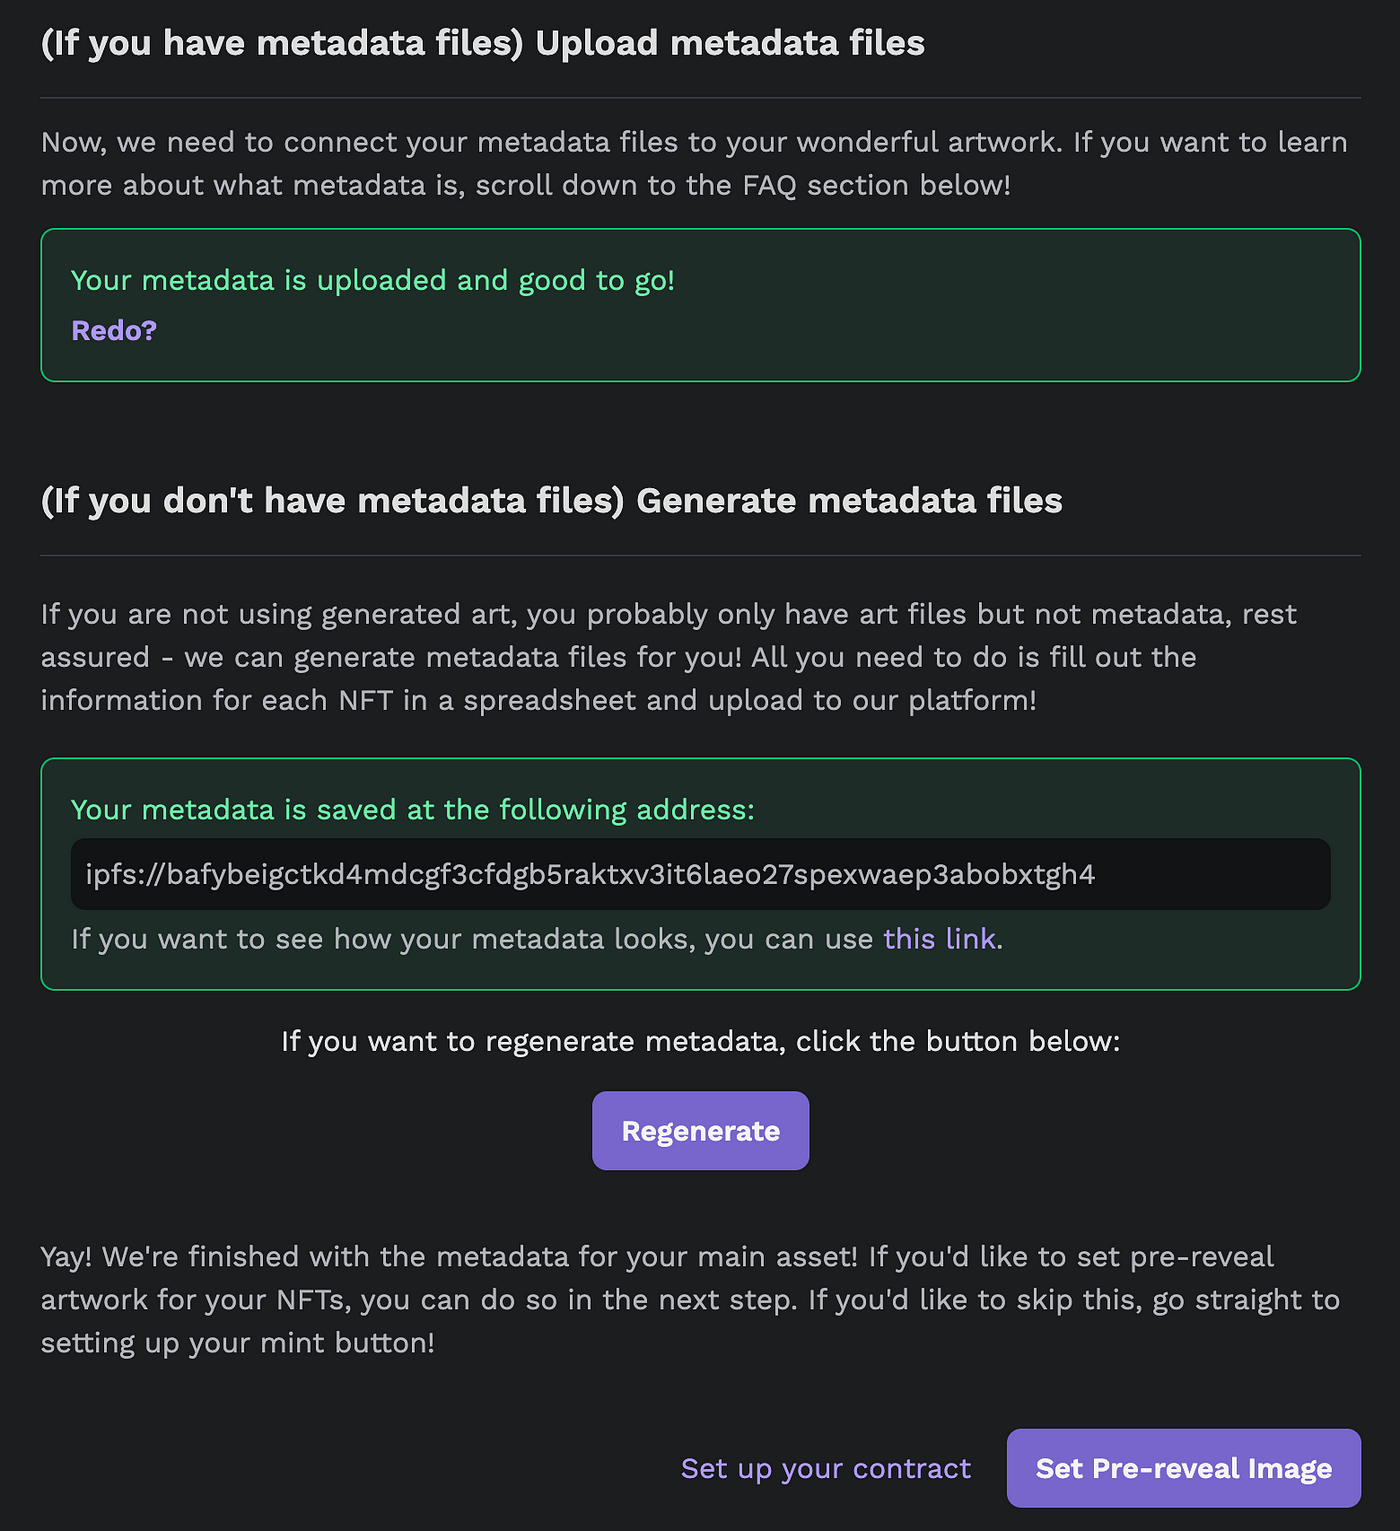
And boom! You’re all done! We even uploaded all your metadata to IPFS for you and saved it so you’re all good for your smart contract deploy in Launchpad! How awesome is that? 🙂
Sweet — hope that all helps! Can’t wait to see what you all build!
Further Reading

How Much Does It Cost to Make an NFT?
Using NFT Art Generator Layer Rules to Create Your NFTs!
How to Start an NFT Collection
An NFT Marketing Plan: Grow Your Twitter from 0-20k Followers
NFT Terminology