
Before getting into how to generate NFTs, let’s make sure you’re in the right place! This article will break down how to generate an NFT collection, using ERC-721a. This makes sense if you’re interested in generating a collection of 10,000 NFTs, similar to Bored Ape Yacht Club.
How to generate an NFT collection
Let’s say you’ve been browsing OpenSea and you notice that all the top collections this week consist of 5,000 unique NFTs. Inspiration strikes! You feel motivated! You decide you want to figure out how to generate an NFT collection of your own. However, you have no prior experience and are starting from step 0. I promise, there’s no need to worry.
Even if you have absolutely no technical or artistic experience, you’ll be amazed at how simple it is to learn how to generate an NFT collection.
How does NFT art generation work?
I laugh thinking back at this, but when I first saw Bored Apes, my mental note was “wow, did somebody really illustrate 10,000 different designs?”
The answer to that is no – not even close. NFT art generation is a process where the creator designs many layers (imagine: a body, different hats, different eyes, different mouths), and then drops them all into an art generator program. The art generator randomly combines these layers to form complete images. Art generators can create 10,000 unique images in an instant, as long as you provide the different layers. It’s an automatic and random process and produces pretty amazing results faster than you can blink.
With generated NFT collections, any single token is made up of multiple layers, also known as traits.
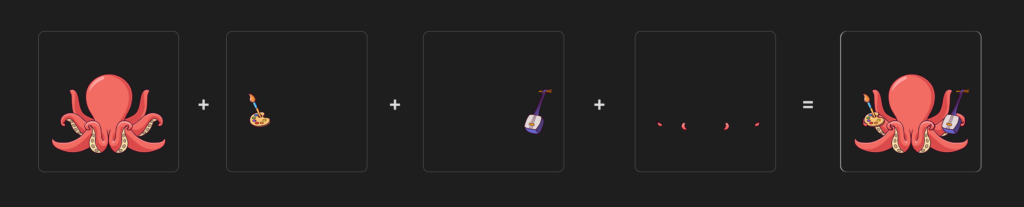
If you look at an NFT from the Curious Addys collection on OpenSea, you’ll see a finished image with many different design elements: you see a green background, a red octopus, pizza, a sailor’s hat, and so on.
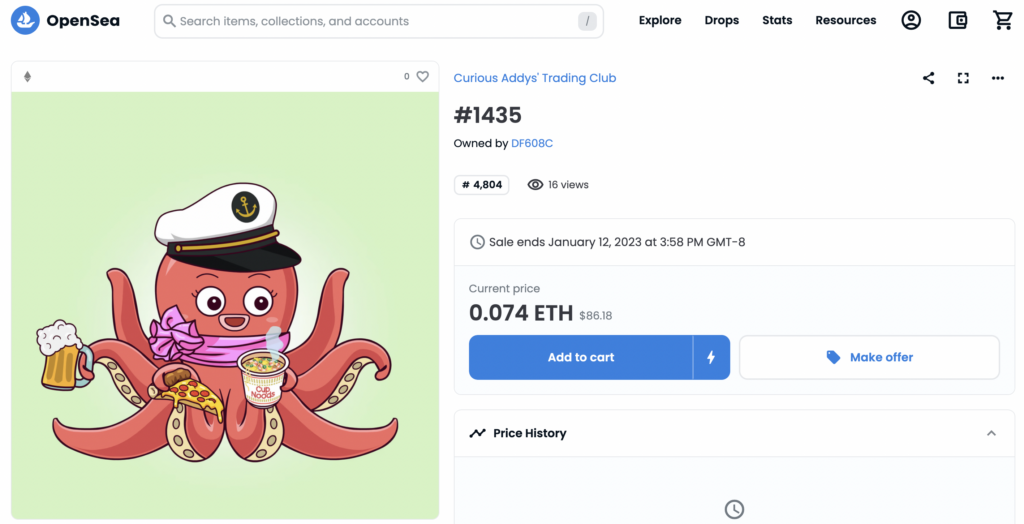
If we just scroll down on OpenSea, you’ll see the individual layers, or traits, that make up this NFT:
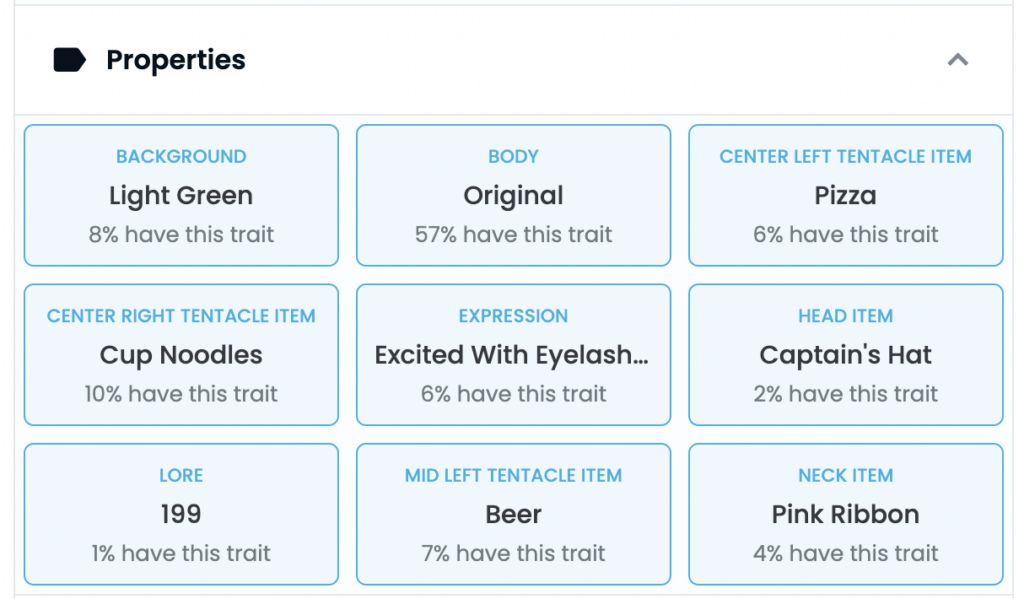
Each of those layers was individually designed as separate, independent files. The art generator is what put everything together.
What are the steps required for NFT art generation?
Creating a generated NFT collection is a really fun experience! No matter how much you think through your layers and imagine how they’ll be combined, you’ll be pleasantly surprised to see all the unique combinations that the art generator makes.
To generate an NFT collection, you’ll need a few things:
- Artwork: the individual layers that will come together to form your NFT)
- An art generator: a tool that will combine all your layers into a collection of 5,000 unique NFTs
Then, in order to actually sell your NFT collection to the world, you’ll need:
- A smart contract: so that your images actually become NFTs on the blockchain
- A mint website: for your fans to purchase your NFTs
These items may seem daunting at first, but don’t worry! We’ll walk you through it all. Let’s focus on how to generate an NFT collection:
How do I create artwork for NFTs?
Like we mentioned earlier, generated NFTs are made up of individual layers. Those individual layers are fed to an NFT art generator, which combines your layers to make unique images.
The first thing you need to do is actually create that artwork. You need to create each of the individual layers that will later be used by the art generator.
Here are a few options on how to get layer design done:
Option 1: Design it yourself. I know, if you don’t have previous artistic experience, the idea of designing layers yourself sounds incredibly scary. However! If you’re on a strict budget, it’s something worth considering.
Learning how to design artwork yourself is completely possible, and you don’t have to become Van Gogh overnight!
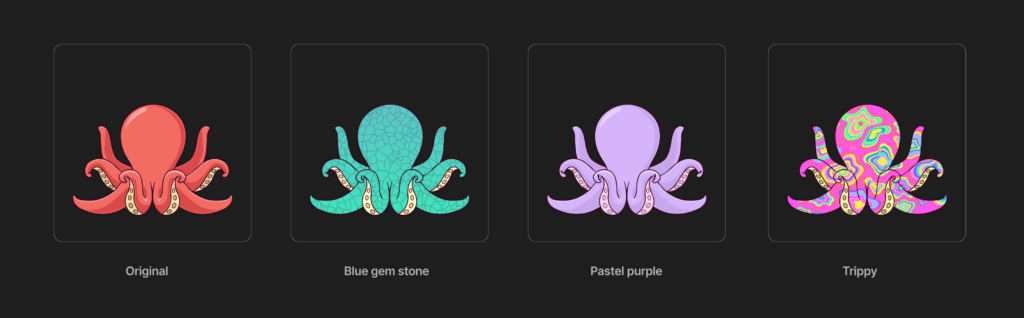
If you browse the top 100 collections on OpenSea, you’ll notice there’s a wide range of design styles and complexity. Some NFT collections are incredibly detailed and complex, while others are much more simple. There are even amazingly successful collections that use pixel art!
My point here is: simple artwork can still do incredibly well in the NFT space. Learning how to create simple art may be a possibility for you!
There are so many incredible tutorials on YouTube for illustrating any subject you can think of, in any style that you can think of. All you have to do is visit YouTube and search, “how to draw (insert style here)” and you’ll be amazed at how many beginner-friendly tutorials there are.
Option 2: Use AI generators. If you don’t feel confident in your artistic ability, you can still create beautiful artwork with an AI tools like Midjourney. If you’re not familiar with Midjourney yet, you’re in for a treat! Midjourney allows users to write out descriptive prompts, and it will generate detailed images for you.
For example, I typed in “an illustration of an adorable dinosaur, eating cheese” and this is what it generated for me:
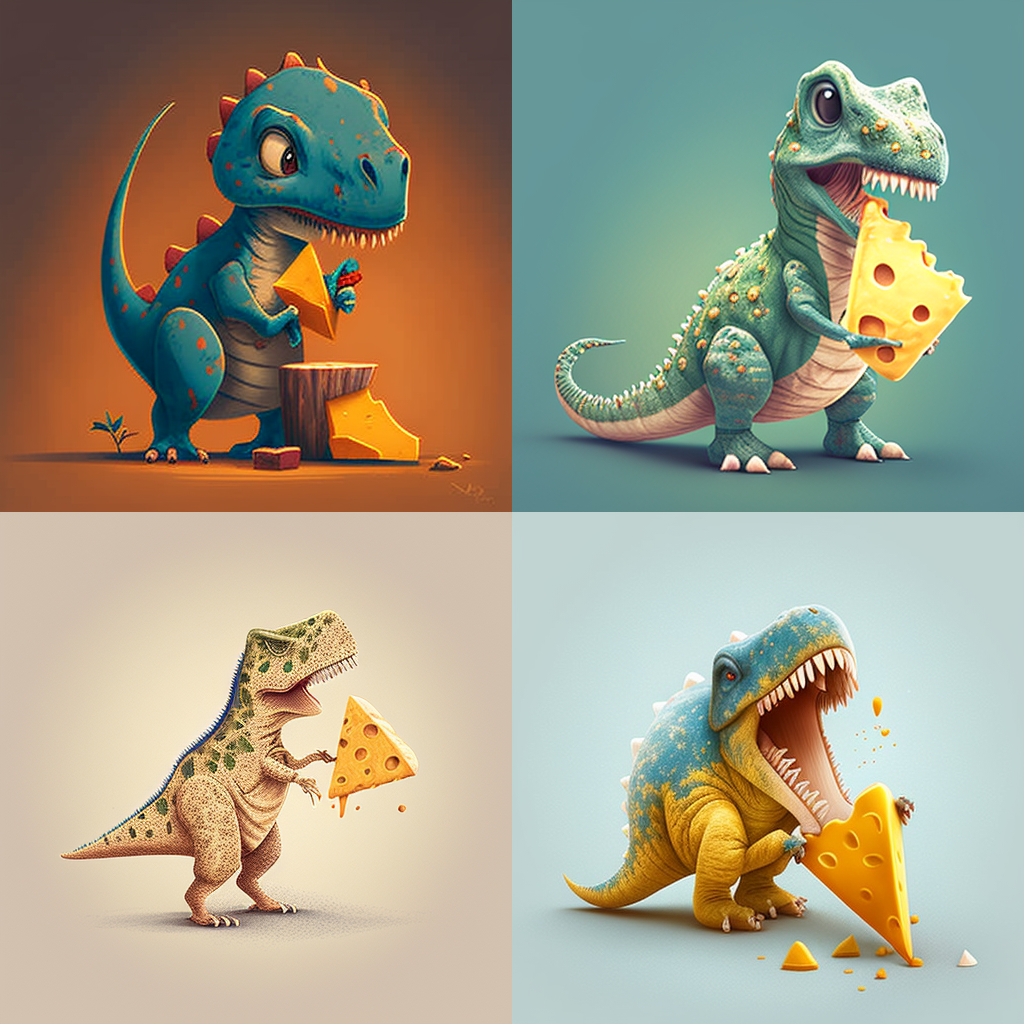
Midjourney allows you to specify everything from art style, to color palette, to aspect ratio. It’s an incredible tool for creators to visualize their ideas, without having previous experience illustrating or designing.
Analog Dreams has an amazing Midjourney Masterclass that I highly recommend for any beginners who want a beautifully comprehensive walkthrough on how everything works.
Option #3: Hire a freelance artist from Dribbble. Dribbble is a wonderful resource for finding art inspiration, as well as designers to hire all around the world. You can use their Designers For Hire page to find amazing artist within your budget. Even with rates as low as $5-$10 dollars per hour, there are so many talented designers to pick from.
Option #4: Hire a specific artist to be a part of your team. You can bring an artist to be a core team member, or even a co-founder. The difference between hiring an artist for hourly work, versus hiring an artist to be a part of your team, comes down to the amount of time they’ll spend on your project and the different payment structures available.
For more in-depth information on each of these options, and more details on how much they cost, please check out: How much does it cost to create an NFT collection?
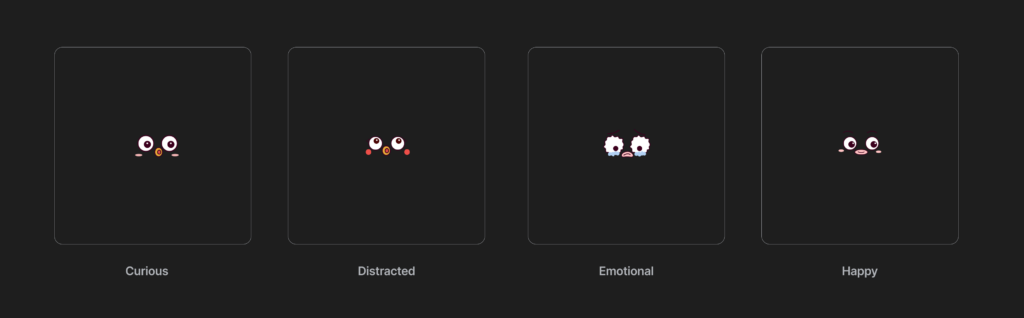
When you’re finished designing your layers, they will all be on their own individual files. For example, you may have a series of different eyes that look like this:
As well as a series of different bodies, like this:
You can even have items that go together yet appear on two different layers! For example, if an octopus is holding an object, a tentacle may need to be designed over two layers. There’s the back of a tentacle (which is underneath the object held) and the front of the tentacle (which is above the object held):
There is no specific number of layers necessary in order to make a collection, but having more layers allows your collection to be much more diverse, with more unique combinations.
To have a robust collection, a general rule of thumb is about 50 different layers for a collection of 5,000. Those layers may pan out like this:
- 10 different body colors.
- 10 different hair colors.
- 10 different hat colors.
- 10 different eye designs.
- 10 different mouth designs.
This is not a strict formula, though! You can have more or less of any particular item. Once you begin the art generation process, you can always go back to the design phase and create more traits if you feel that your NFTs don’t have enough variation.
Once my artwork is created, how do I generate an NFT collection?
How do I generate an NFT collection?
Once you have your layers designed, you’re ready to see all those layers come to life. You’re going to give an art generator all of your layers, so that you don’t have to manually make 5,000 unique NFTs.
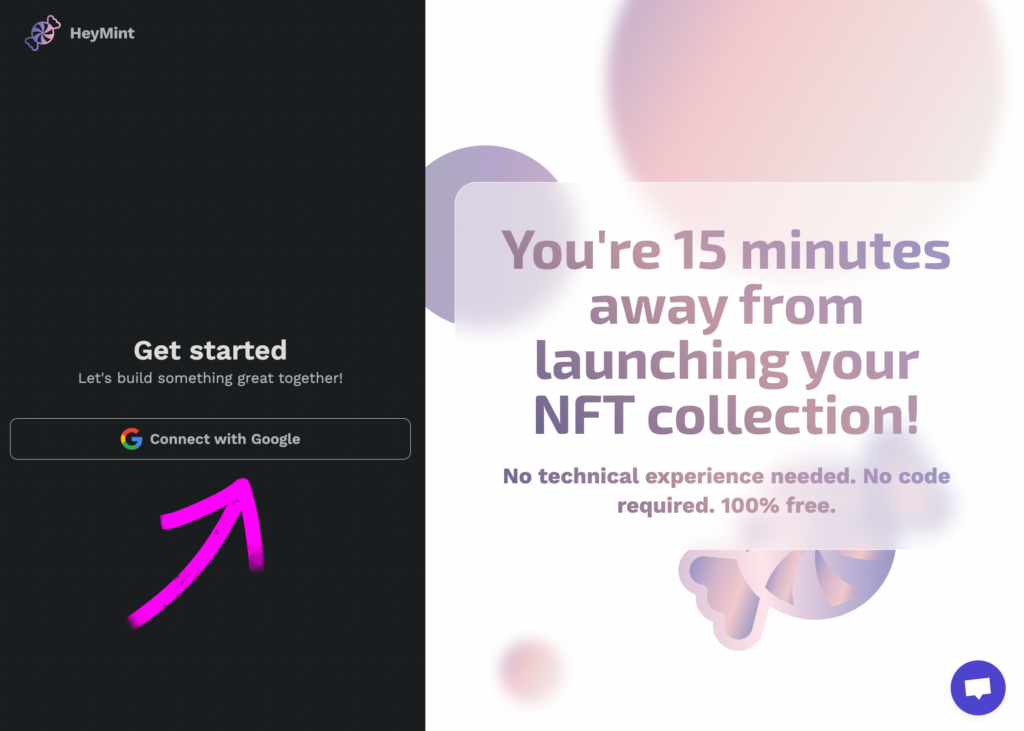
First, make an account with Launchpad, a free no-code NFT toolbox with an awesome art generator:
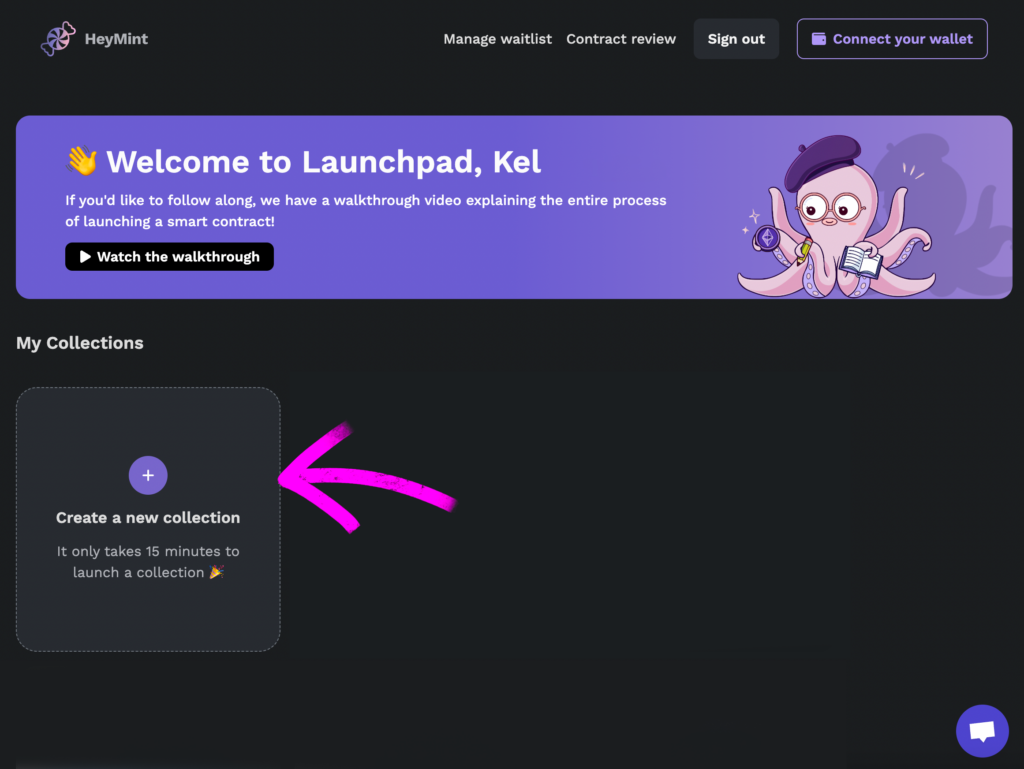
Second, create a new collection:
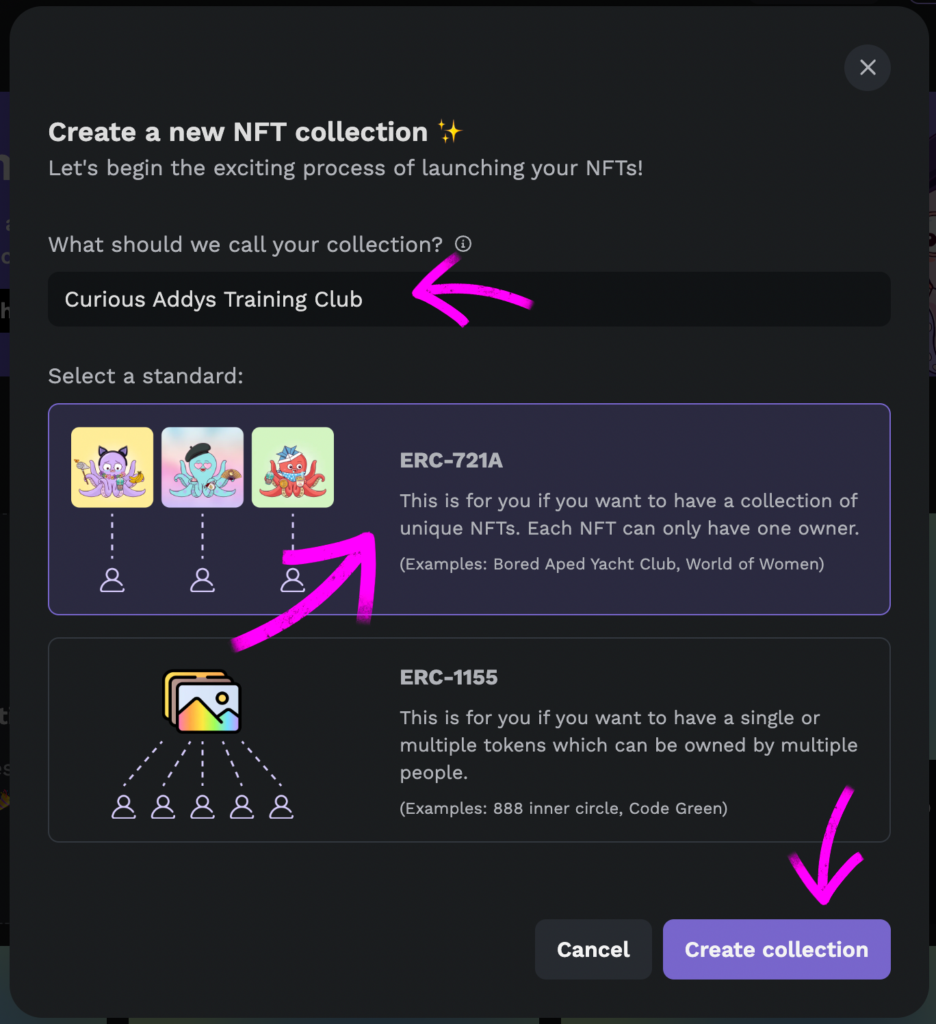
Third, fill out your collection name, select ERC-721A and click on “Create collection”:
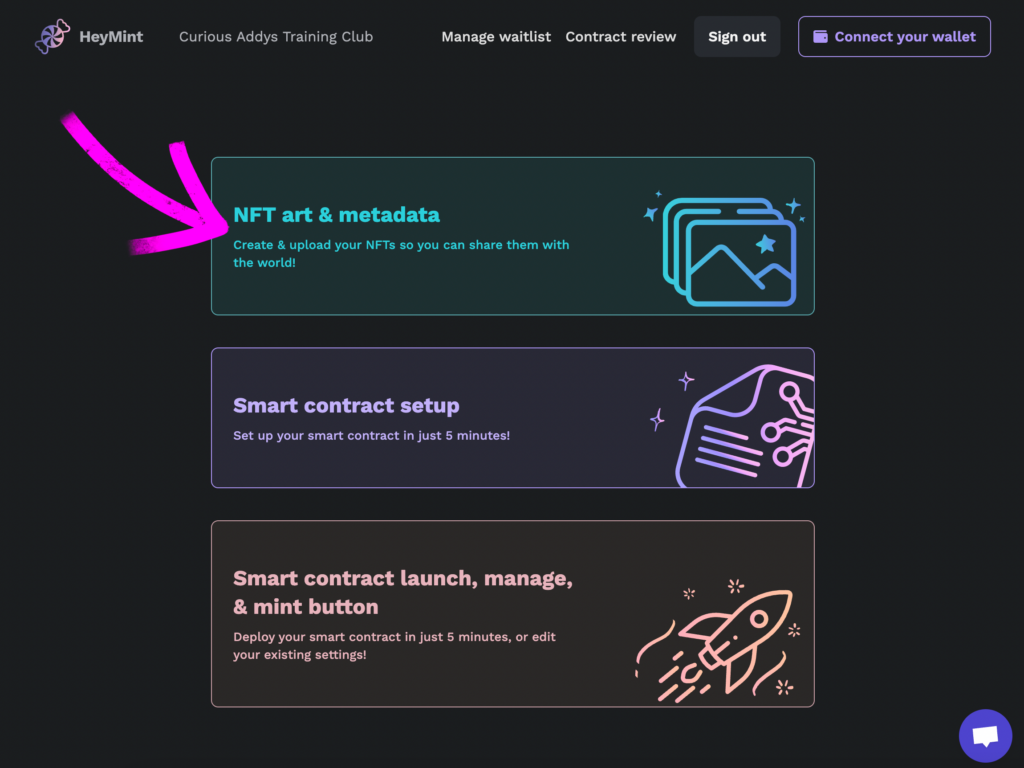
Next, click on “NFT art and metadata”:
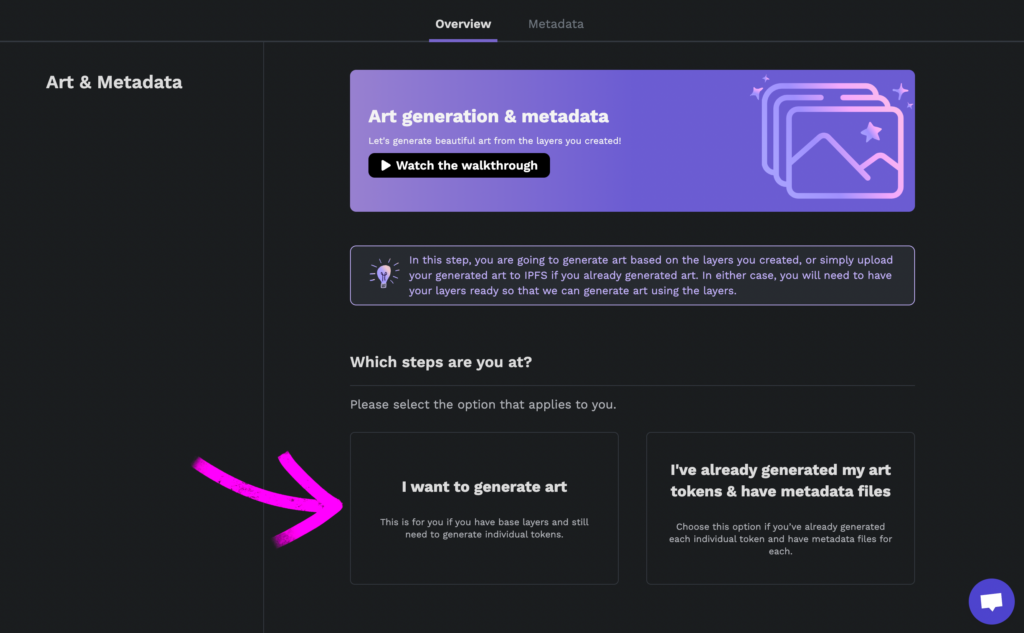
Next, click on “I want to generate art”:
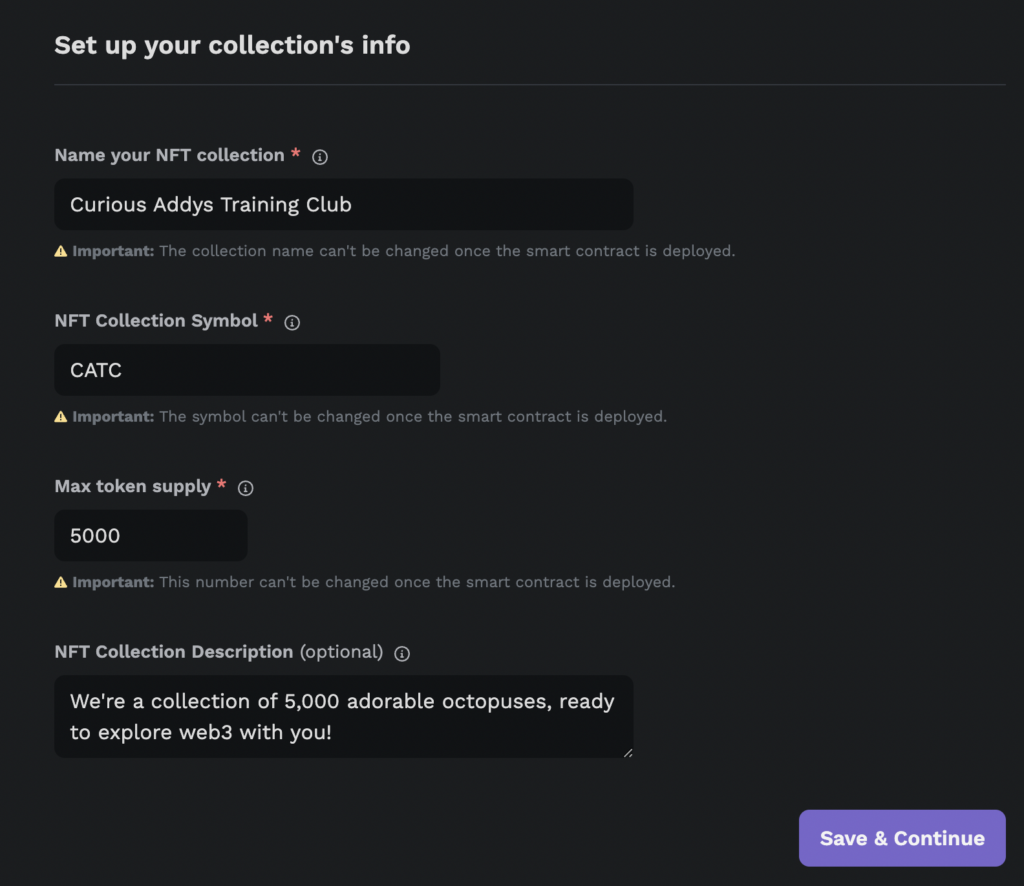
Fill out your NFT collection’s info:
From here, you’re ready to use the art generator! This is (in our opinion) the most exciting step in the whole process!
You’ll notice the NFT art generator has 7 steps at the top:
Let’s go through each of them one by one!
How to generate NFTs with an art generator
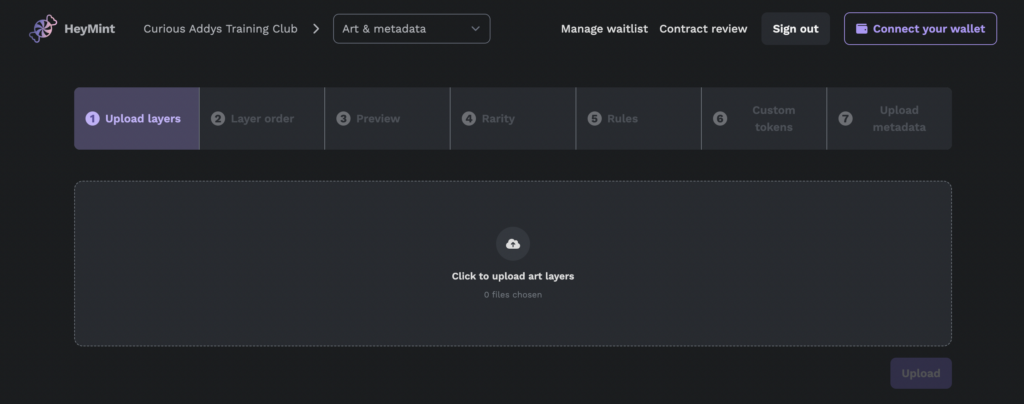
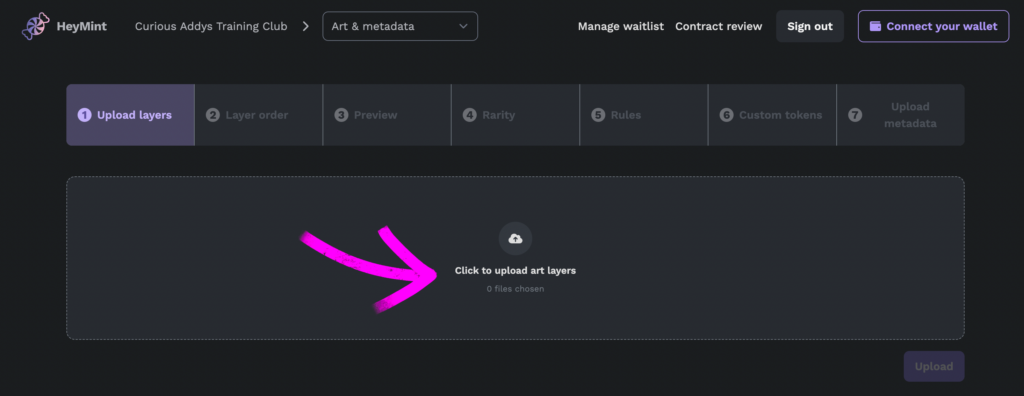
Step 1: Upload your NFT layers
Now’s the time to do a little organization. Before you can upload your layers, you’ll need to make sure they’re organized in a way that the generator can understand. You’ll want to have 1 main folder, then subfolders inside to represent each layer.
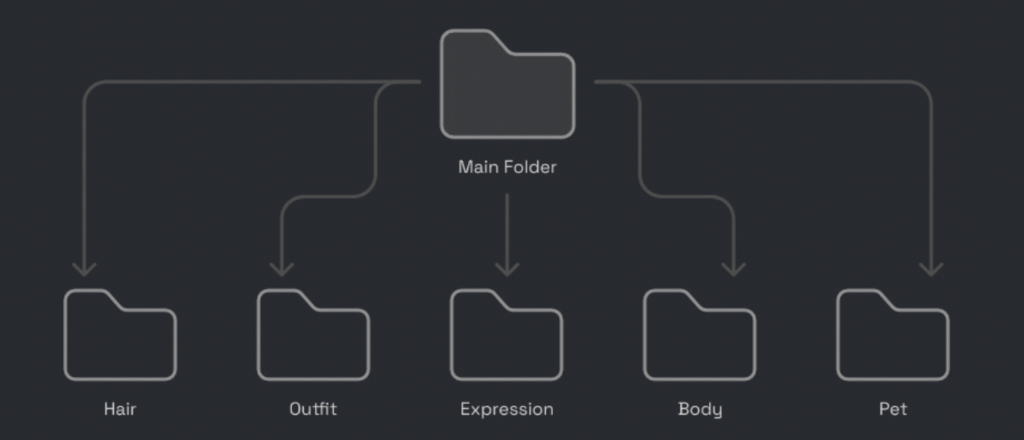
In the image above, you can see that there is a separate folder for hair, outfits, expressions, bodies, and pets.
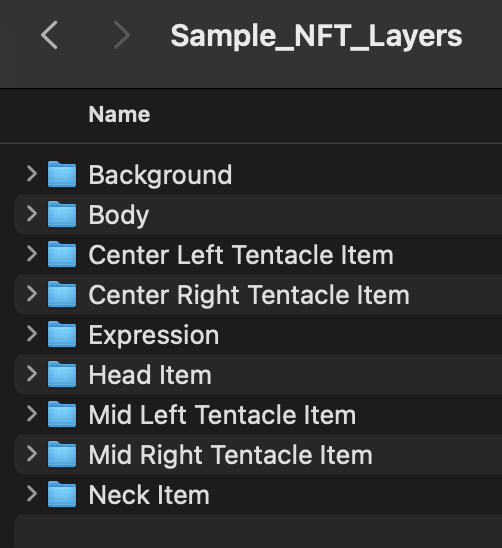
Here’s an example of how this looks in practice:
Within the main folder called “Sample_NFT_Layers”, there are sub-folders for each layer:
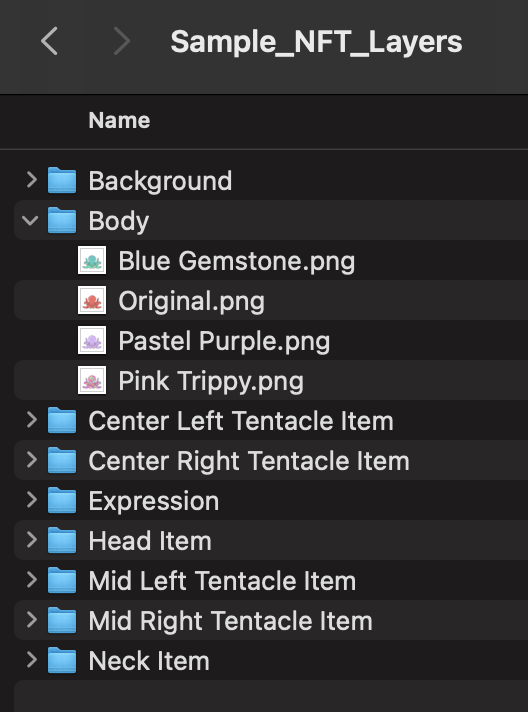
If we open up one of the folders, you can see 4 different designs inside:
Once your files are organized like this, you can upload them into the art generator by clicking on “click to upload art layers”. When you do this, make sure to just upload the one main folder (with all the little sub folders inside):
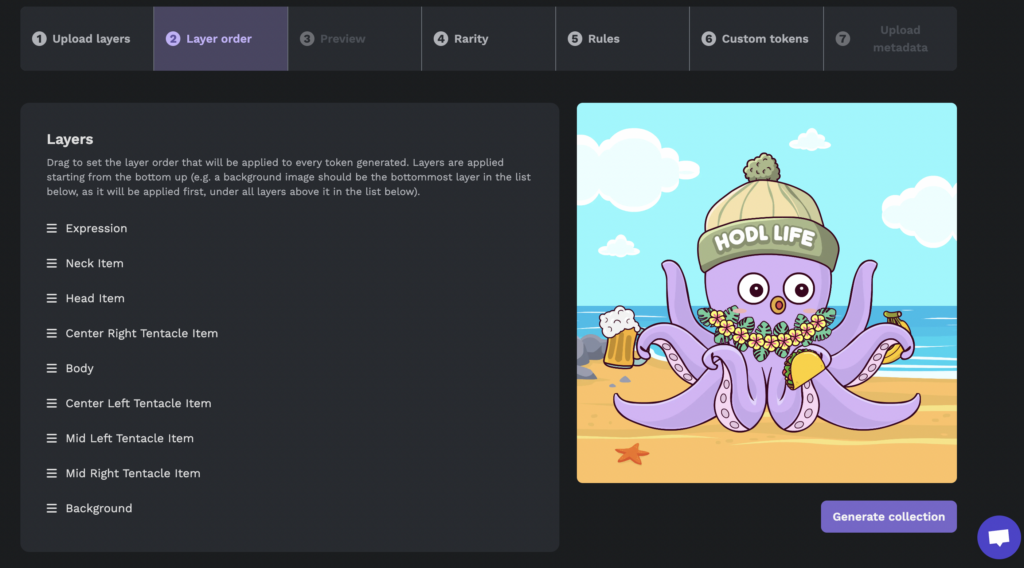
Step 2: Set your NFT layer order
The order to your NFT’s layers will be important to make sure the generator designs them the way you want. You wouldn’t want your entire NFT to be hidden, just because the background layer is accidentally all the way on the top!
On this page, you can drag your layer order to make sure everything is in the right place.
In the example below, our layer order is not correct. Because of this, the token preview looks incorrect. The hat is underneath the body, the accessories aren’t being held by the arms:
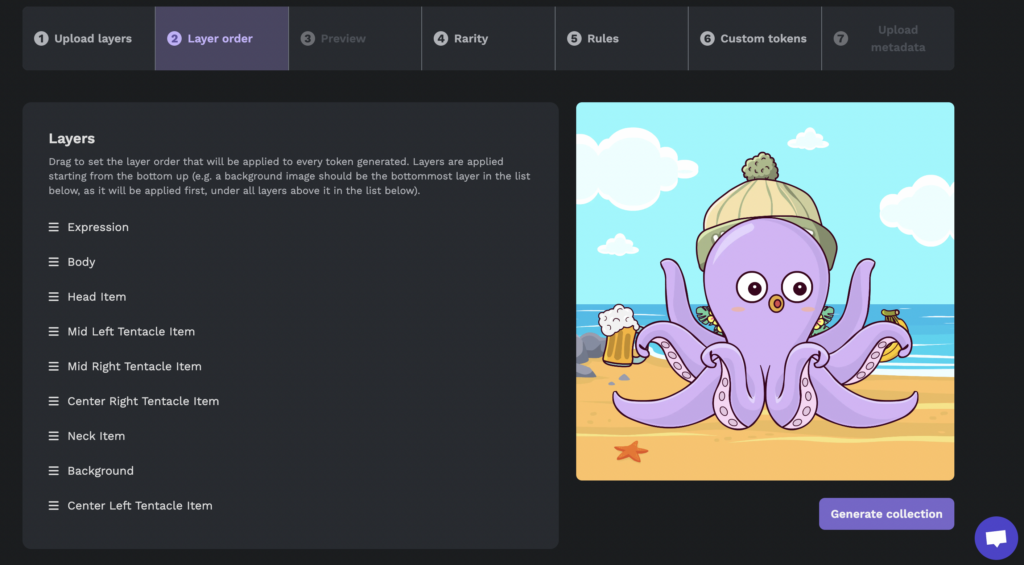
However, by dragging the layers into the right position, everything falls into place:
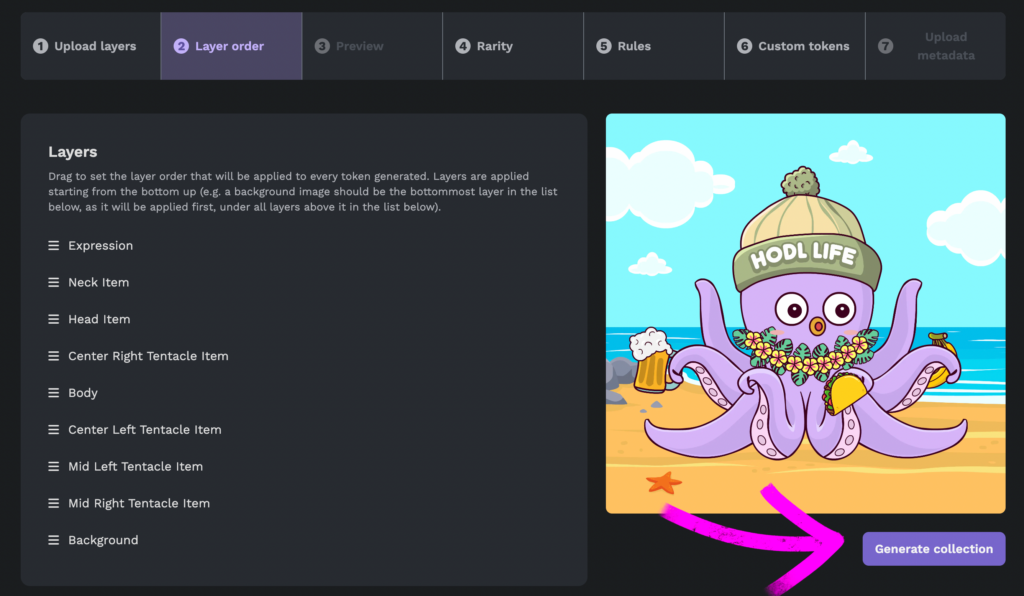
When your layer order looks correct and you’re ready to move on and preview your NFT collection, you can click “generate collection”.
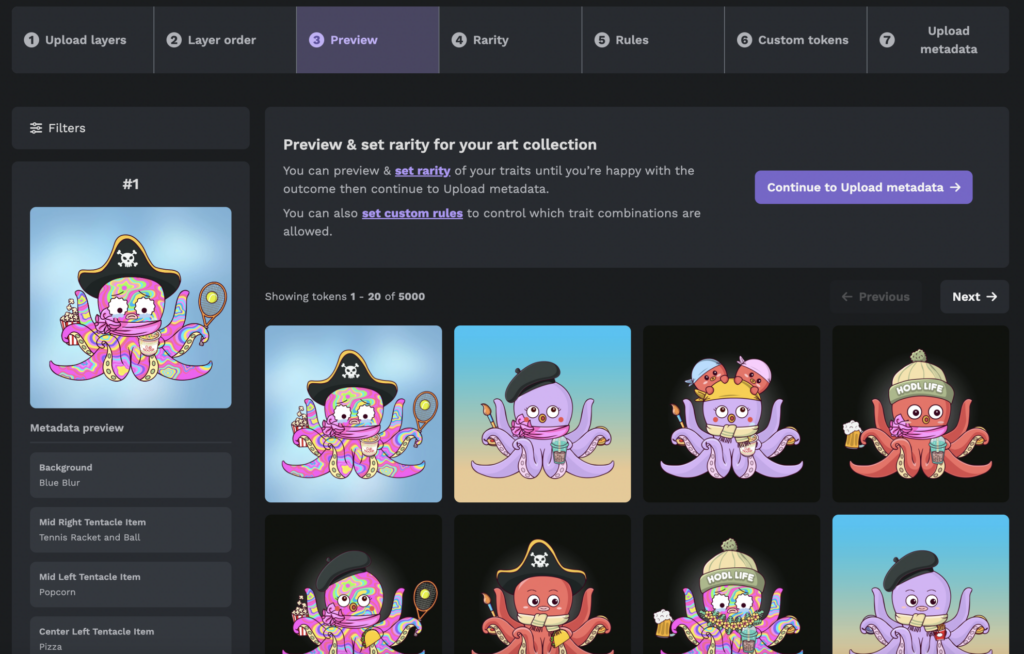
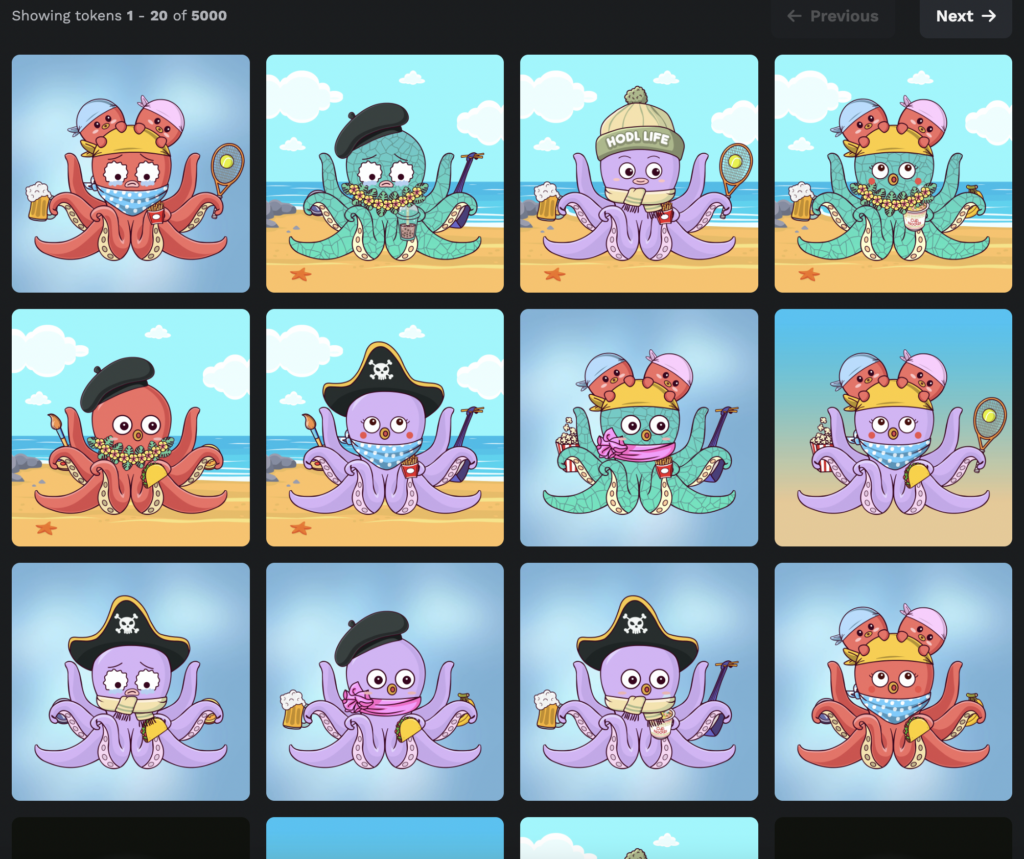
Step 3: Preview your NFT collection
In just a few seconds, you’ll be able to preview your entire NFT collection!
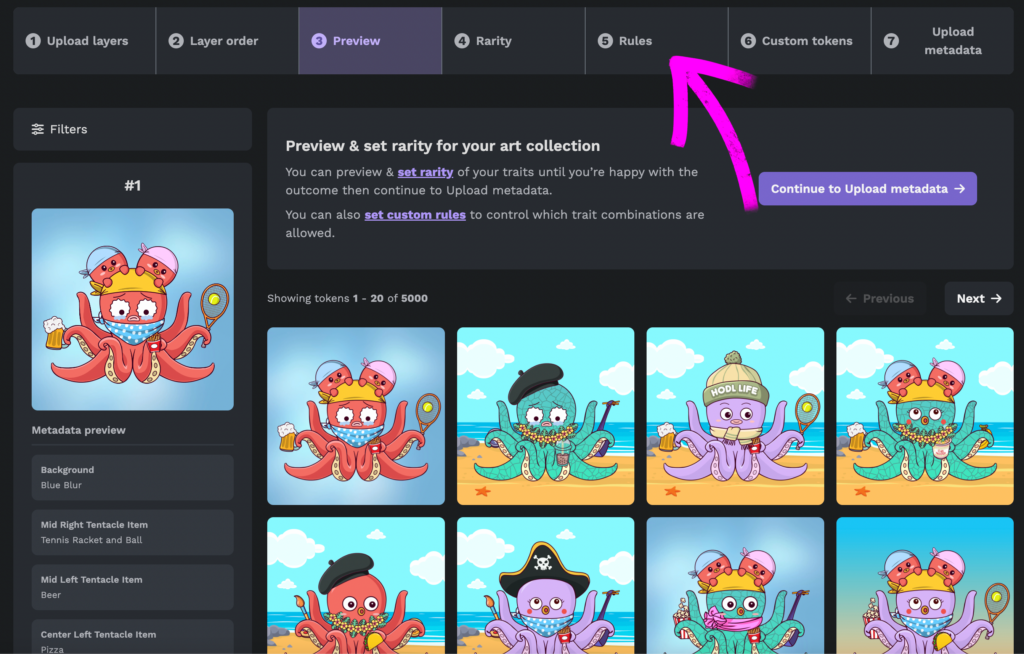
As you preview your NFT collection, you can evaluate what you’d like to do next. If everything looked perfect as is, you could skip steps 4-6 and proceed with storing your NFTs on the blockchain. You can do so by clicking “continue to upload to metadata”:
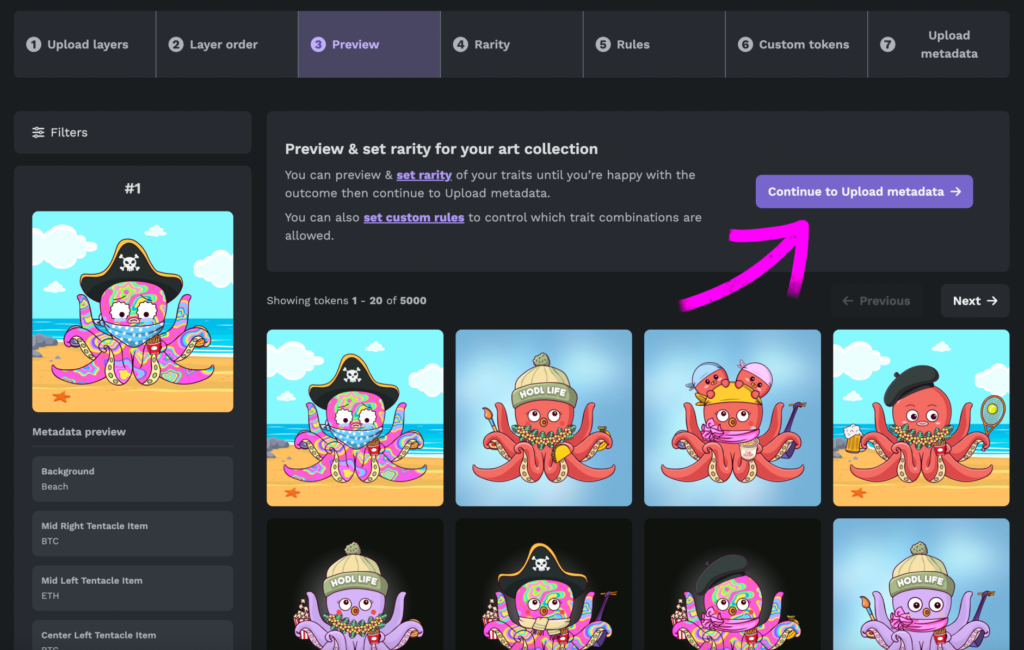
But, if you’d like to add further customization to your collection by specifying rarity or layer rules, let’s proceed with the next step!
Click on “rarity” in the top navigation:
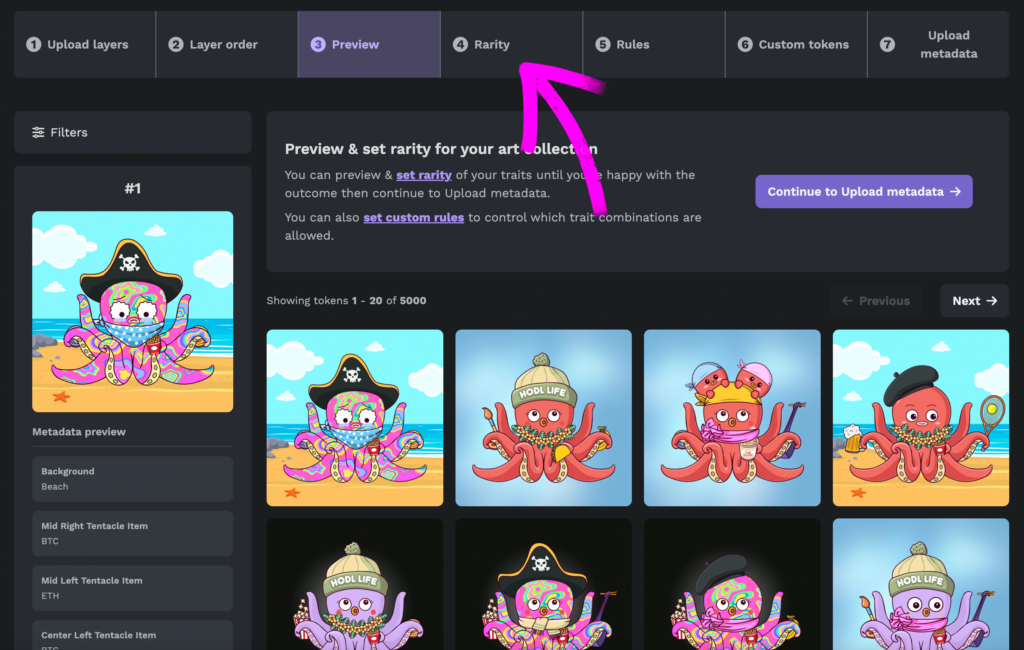
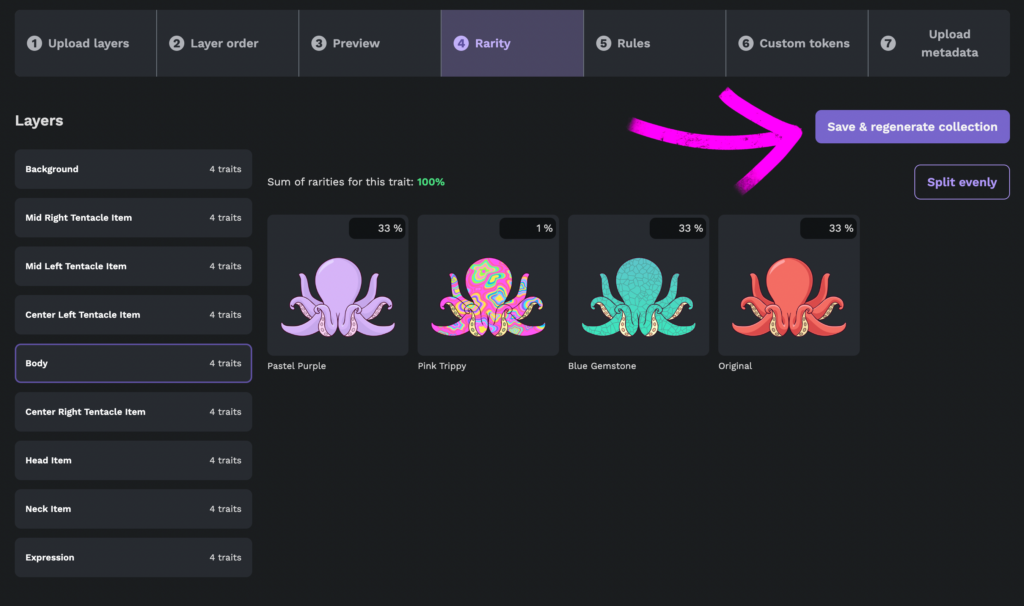
Step 6: Set NFT layer rarity
Layer rarity is a fun way to add an element of scarcity to your collection. Maybe you have specific traits that you want to be extra rare, because they come with special perks.
The rarity section of the NFT art generator allows you to customize how often a layer appears in your collection.
If, for example, you set a background to 100% – that background will appear 100% of the time. Out of 5,000 NFTs, all 5,000 will have that background.
If, however, you set a background to 2% – that background will appear only 2% of the time. Out of 5,000 NFTs, only 100 NFTs will have that background.
In the example below, notice how we have set all of the body layers to 33% rarity, except the pink one. That one is 1% instead:

This means that the pink body is incredibly rare, and will only show up in 50 out of 5,000 NFTs. All of the other bodies will collectively show up 99% of the time and appear in the remaining 4,950 NFTs – and individually they will show up 33% of the time, and appear in 1,650.
NFT rarity requires a little bit of math to imagine how it will impact your collection! But the general idea is that the lower the percentage is, the less it will appear in your collection!
Once you’re happy with the rarity you’ve set amongst all of your layers, you can click on “save & regenerate collection” to preview how these changes will impact your designs:
Because we set the pink body to be extremely rare, at a 1% rarity, my newly generated NFT collection looks very different! We don’t even see a pink octopus on the first page:
You’re welcome to tweak your rarity and re-generate your NFT collection as many times as needed, until you’re happy with the frequency of each layer.
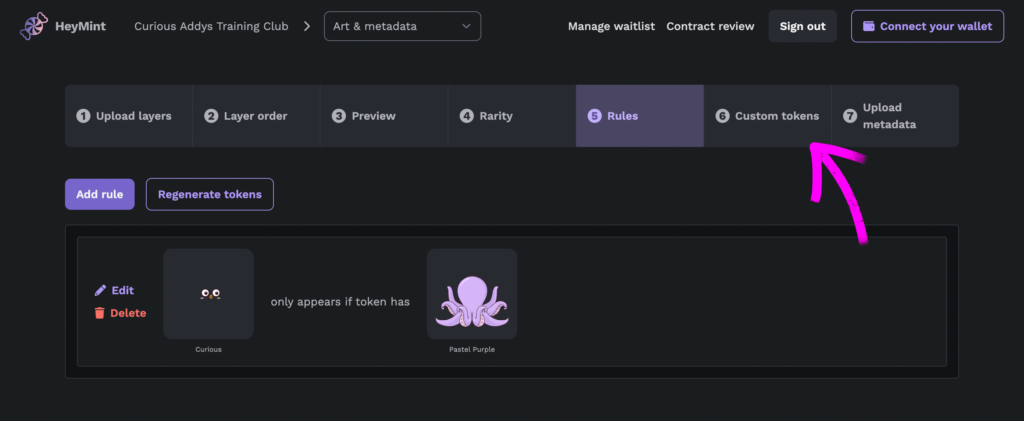
When you’re ready to move on to the next step, click on “rules” in the top navigation:
Step 5: NFT layer rules
Launchpad allows you to add incredibly complex NFT layer rules, which is wonderful for situations when you have guidelines on how and when certain layers can appear.
There are 4 layer rules you can add:
Rule #1: Only appear with. One layer will only appear if the NFT has another layer. (Example: Earrings will only appear if the NFT has ears. This doesn’t mean that earrings will always appear if the NFT has ears, but that ears are a prerequisite to earrings.)
Rule #2: Never appear with. One layer will never if the NFT has another layer. (Example: Purple hair will never appear if the NFT has a purple background.)
Rule #3: Always appear together with. Two layers will always appear together in an NFT. (Example: A bikini top and a bikini bottom will always be present together. There will be no NFTs with just bikini tops, and no bikini tops with just bikini bottoms.)
Rule #4: Always appear at least with. One layer will only appear if the NFT has one layer, out of a list of layers. (For example: a winter hat will only appear if the NFT also has a scarf, mittens, and hot chocolate. The scarf, mittens, and hot chocolate are a prerequisite for the winter hat to appear. However, a scarf, mitten, or hot chocolate could appear without a winter hat.)
Rules are an advanced aspect of NFT design – we have a whole blog post dedicated to breaking each one down with examples! If you’d like more information on these rules, read: Using NFT Art Generator Layer Rules to Design Your NFT Collection!
Once you’re done adding rules, you can click on the next step!
Step 6: Set up custom tokens
Launchpad allows you to add completely custom tokens into your collection. The tokens you insert will replace the tokens in your collection. This means if you generated 5,000 tokens and added 5 custom ones, your collection is still 5,000 rather than 5,005.
Custom tokens are awesome for a variety of situations!
- Ultimate rarity. You can add a special token that’s truly one of a kind. Perhaps this special token gets unique rewards and privileges, so you want to closely control the number of these that appear in your collection
- Setting aside tokens for your team. You can add custom, personalized tokens just for your team members.
When you’ve finished inserting your custom tokens, you’re ready for the final step of the NFT generation process!

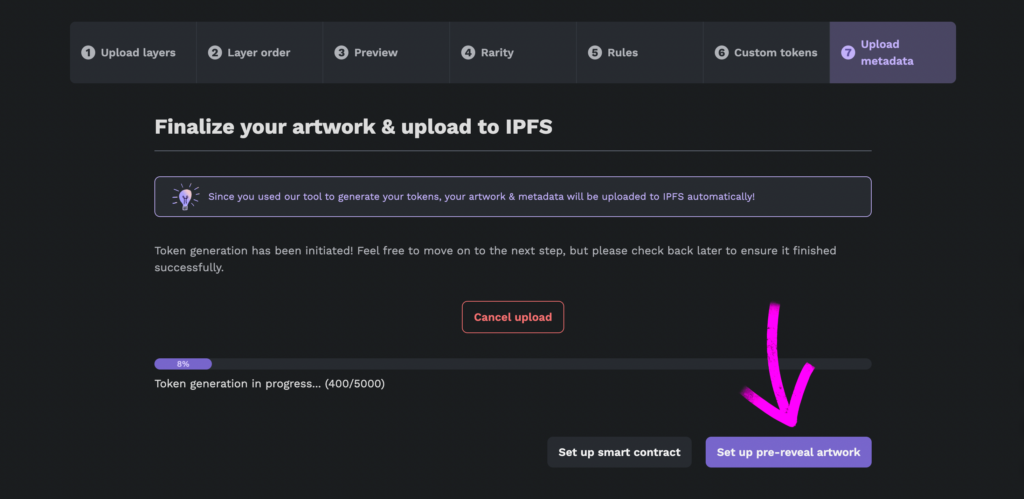
Step 7: Upload your NFT collection’s metadata
Horray! You’re almost done generating your NFTs!
When you use Launchpad, we automatically upload your NFTs to decentralized storage for you! All you have to do is click on the “upload token & metadata to IPFS” button to get that process started:

A progress bar will appear, letting you know how the upload process is going.
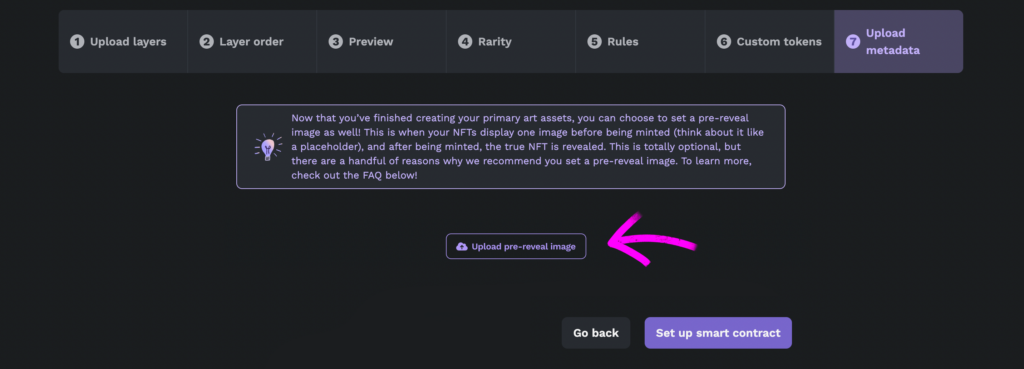
While you wait, you can move on to the next steps! Now, you can set pre-reveal artwork for your NFTs. This means that when your collectors are minting your NFT, they won’t see their actual NFT design yet. Instead, they’ll see a placeholder image that will display until you decide to reveal the NFT.
For example, let’s say you’re making a collection of 5,000 birds. You may want your pre-reveal image to be identical eggs. Then, when you reveal your NFT, all of the token holders will see their individual bird NFTs instead of an image of an egg.
To set up pre-reveal artwork, just click the button labeled “set up pre-reveal artwork”:
Setting up NFT pre-reveal artwork
To set up your NFT collection’s pre-reveal artwork, just click the button labeled “upload pre-reveal image”:
When you’re done, take a pause and celebrate! You’ve completed all of the necessary steps for generating an NFT collection! Now, we need to create a smart contract so that people can actually buy your amazing NFTs.
Further Reading

How Much Does It Cost to Make an NFT?
NFT Collab: How to Partner with Big Projects
An NFT Marketing Plan: Grow Your Twitter from 0-20k Followers
What is a Whitelist NFT?
How to Make an NFT Minting Website