We’re excited to present our comprehensive guide on how to use Launchpad to create a Burn to Mint NFT collection. This step-by-step walkthrough will take you through the entire process. Whether you’re a beginner or an experienced NFT creator, this guide will provide you with everything you need to create and deploy your own Burn to Mint NFT collection with Launchpad. Let’s get started!

Before Deployment
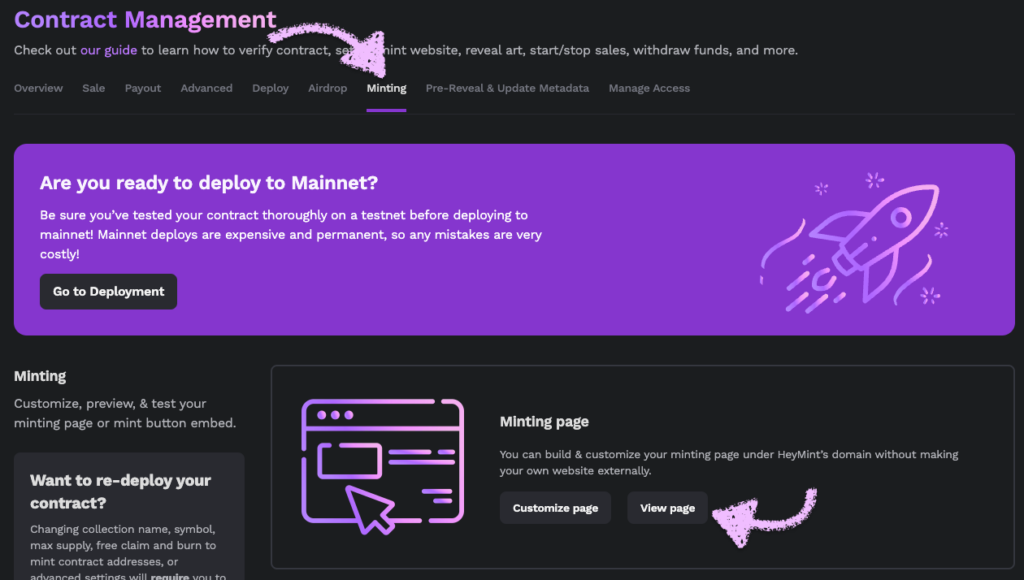
After creating your collection, you will be directed to the Contract Management Dashboard. From here, you can easily navigate between different settings pages such as: General, Sale, Payout, Advanced, and Deploy. Most of these settings will have already been pre-configured based on your previous inputs.
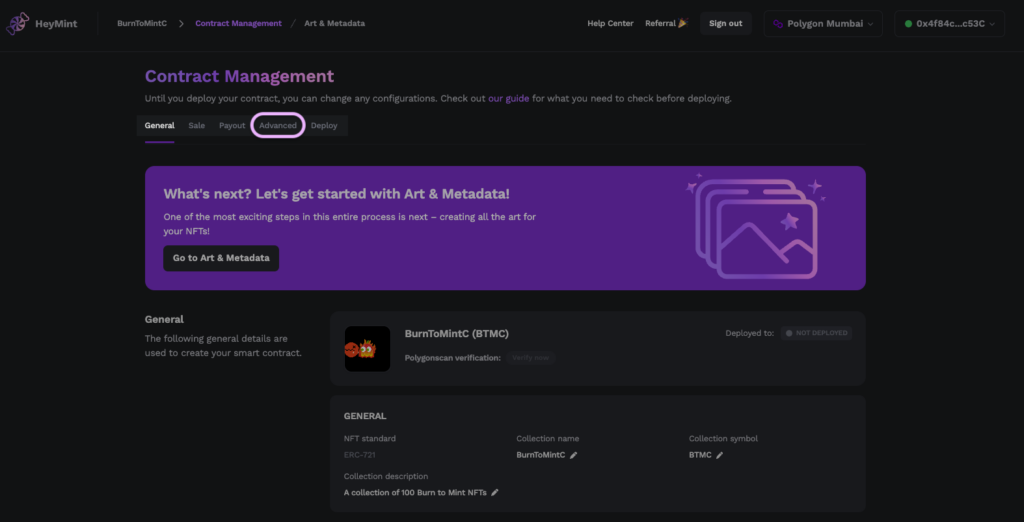
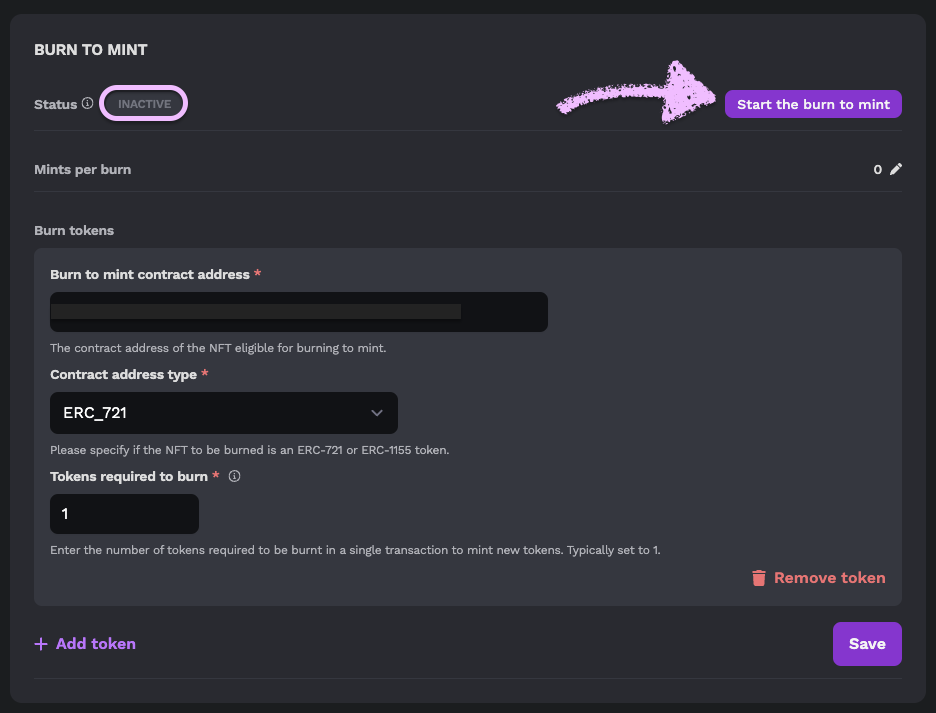
Since we are making a burn-to-mint collection, we’ll want to go to the “Advanced” page and scroll down to the “Burn to mint” section. Here, you can enable the burn to mint feature, which will allow your collectors to destroy (burn) an existing NFT to create a new one.
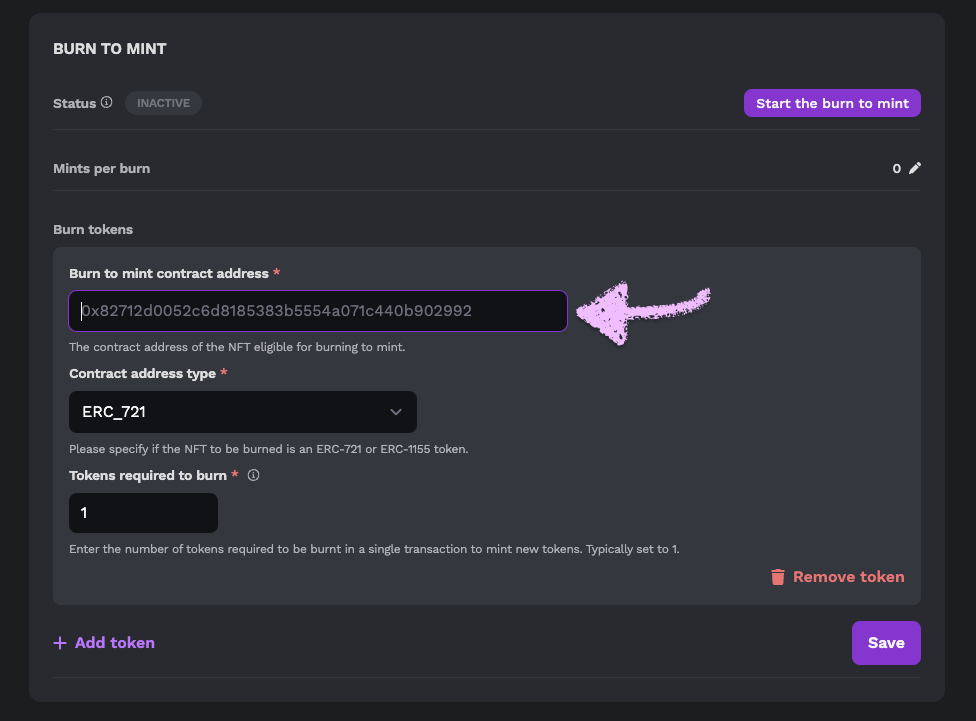
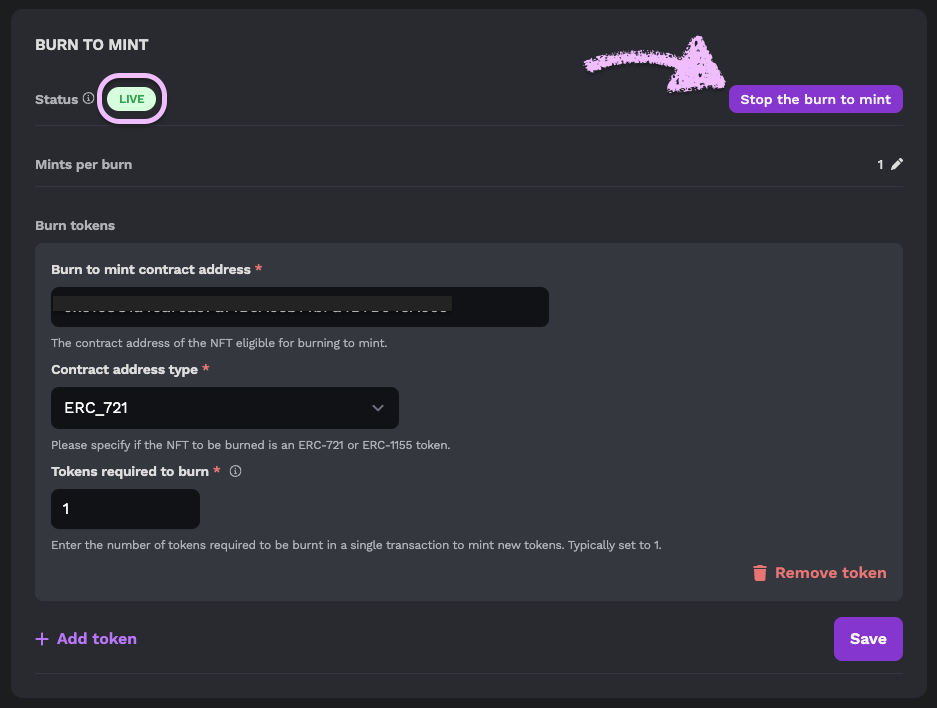
Once enabled, you’ll be able to set the parameters for the burn to mint process, including the number of new NFTs holders can mint per burn, the contract address of the original NFTs to be burned, the type of NFTs to be burned (ERC-721 or ERC-1155) and the number of tokens required to be burnt in a single transaction to mint new tokens. Once you’re all set, click the “Save” button down below to save your burn to mint configurations.

Map URI to first burn token ID
Note: This is an optional setting.
Map URI functionality is designed specifically for cases of contract migration, wherein you can bring your holders over from a previous contract to one you’ve newly created. Migration works by setting the old contract as the burn contract, creating a new collection, and then letting existing holders burn the current/old collection in order to mint from the new one. The main benefit of doing so is that by migrating an old contract, you can make significant changes to your smart contract, including adding new features (such as upholding on-chain royalty enforcement).
If enabled, newly minted tokens will display the exact same name, image, and other metadata as the token burned. Please note that the true token id of the newly minted token will not be the same as the old one, but the metadata will remain the same.
After Deployment
If you’ve already deployed a collection and want to enable burn to mint, here are the steps:
Steps to enable the burn to mint feature:
- Click on Advanced
- Scroll down to “Burn to Mint”
- Click on Add token
- Fill out the required fields: Burn to mint contract address, Contract address type and Tokens required to burn
- Click on Save
Set Up Burn to Mint Page
Creating this page is the same as setting up a mint website.
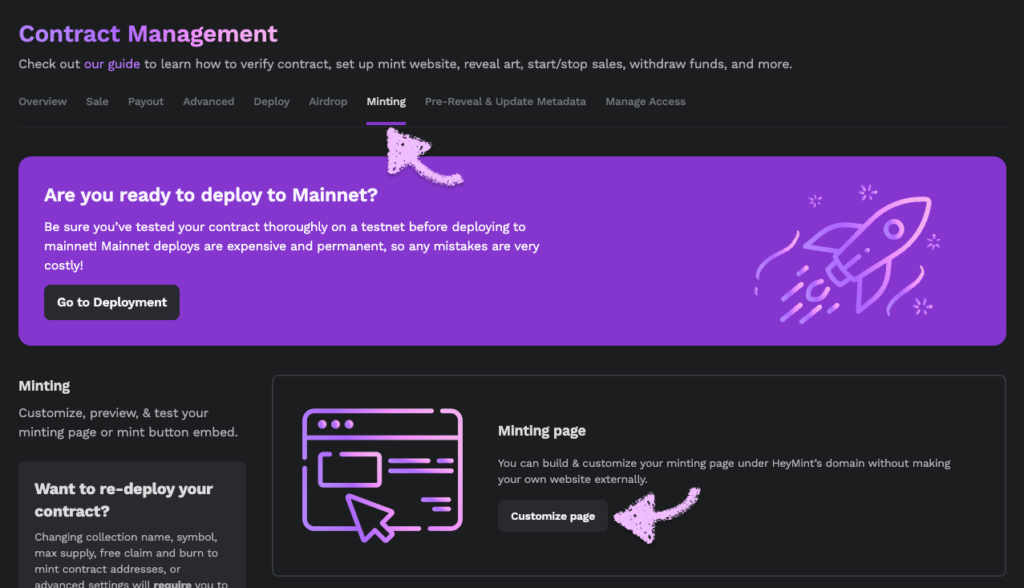
- Click on Minting
- Click on Customize page
- Enter details
- Click on Save changes
- Click on “Preview & publish” and then click “Publish” once everything looks good
- Click on Back to customize
- Click on View live page to see your minting page and save the URL

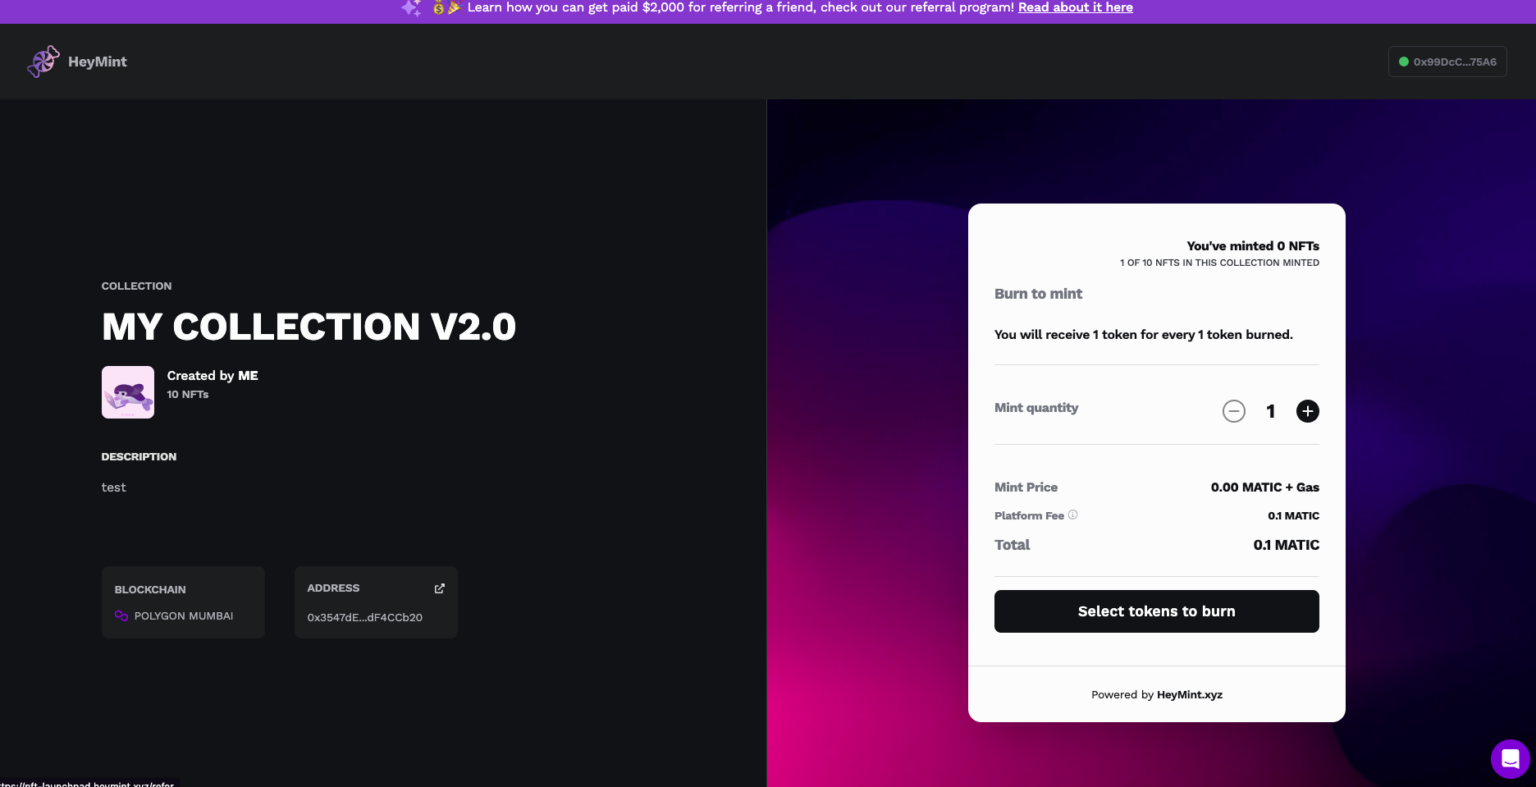
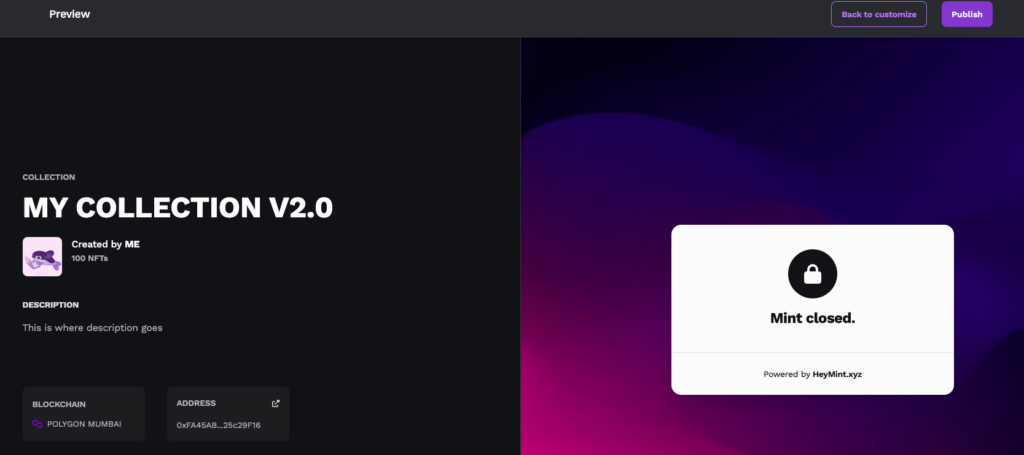
You’re almost there! Starting the burn to mint feature is up next. Once enabled, your collectors can start burning their tokens to mint new ones. Until then, they will see a message that says “Mint closed.”
Start/stop burn to mint feature
Now we enable the feature!
- Click on Advanced
- Click on Start the burn to mint
3. Wait a few seconds for the update
4. Status will show “live”
5. View the mint page
6. Click on View page
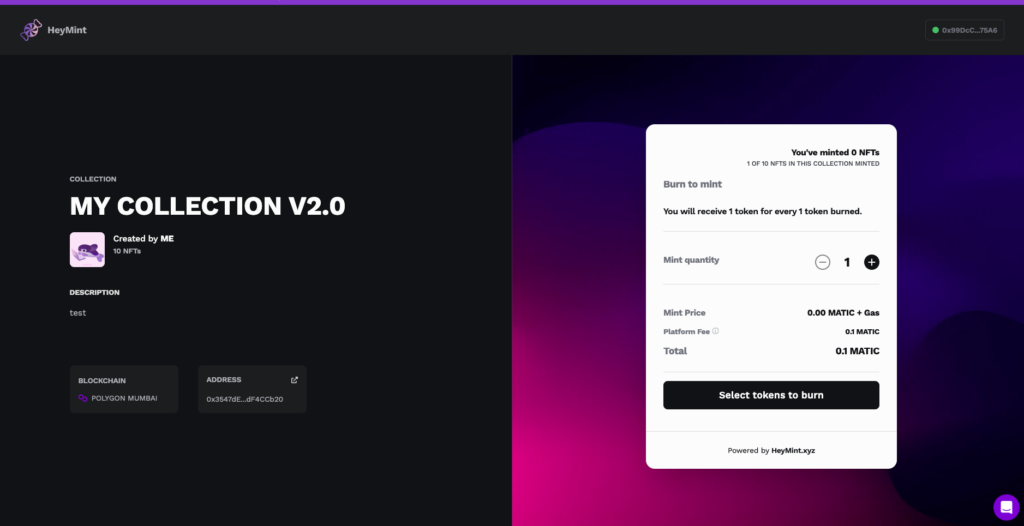
7. This is what collectors will see when the feature is enabled.
Disable burn to mint
- Click on Advanced
- Click on “Stop the burn to mint”
3. And you’re done! 🙂
And that’s it! 💜

If you have any questions about using Launchpad, please share them with our team by connecting with us via the HeyMint chat widget on our website.
And as always, thank you for using HeyMint 🍬